Gateway Recovery Management Stuck at 99% – Factory Reset, Windows 7, Restore, Acer Erecovery, File Copy, Delete, Registration, Logo
Unlocking the Secrets: Gateway Recovery Management’s Perplexing Predicament
Understanding Acer eRecovery Management
If you’re experiencing a situation where Gateway Recovery Management is stuck at 99% during a factory reset on your Acer laptop running Windows 7, there are a few steps you can take to resolve the issue.
First, try restarting your computer and then attempting the recovery process again. If that doesn’t work, you can try deleting any unnecessary files from your computer to free up space for the recovery process.
Additionally, you can try copying important files to an external storage device before attempting the recovery, just to be safe.
If you’re still experiencing issues, you may need to register your Acer eRecovery Management software to unlock full functionality. You can do this by clicking on the Acer logo in the eRecovery Management software and following the registration process.
If you’re still having problems, it may be helpful to contact Acer support for further assistance.
Troubleshooting Acer eRecovery Management
If your Gateway Recovery Management is stuck at 99% during a factory reset or Windows 7 restore, there are a few troubleshooting steps you can try.
First, restart your system to see if that resolves the issue. If not, try reordering the network provider list in the network settings.
If the problem persists, you can attempt a factory reset by following these steps:
1. Power off your Gateway desktop or laptop.
2. Press and hold the Power button for 10 seconds to discharge any residual power.
3. Power on your device and immediately press the Alt + F10 keys repeatedly until the Acer logo appears.
4. Follow the on-screen instructions to complete the factory reset.
If these steps don’t solve the problem, it may be necessary to contact Acer support for further assistance.
Stuck Situations in Acer eRecovery Management
- Press and hold the power button on your Acer laptop to force it to shut down.
- Wait for a few seconds, then press the power button again to turn on the laptop.
- Check if the Gateway Recovery Management continues from where it left off or if it resets.
- If it continues, wait for the process to complete. If it resets, proceed to the next method.

Method 2: Close Unnecessary Programs
- Press Ctrl+Shift+Esc to open Task Manager.
- In the Task Manager window, go to the “Processes” tab.
- Look for any unnecessary or resource-intensive programs running in the background.
- Select the programs one by one and click on the “End Task” button to close them.
- Once all unnecessary programs are closed, check if the Gateway Recovery Management progresses.
- If it doesn’t, move on to the next method.
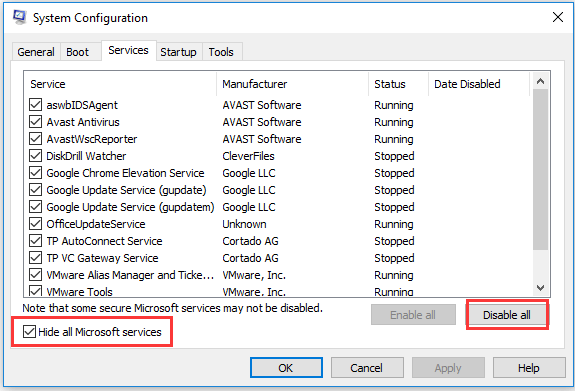
Method 3: Disable Antivirus Software
- Locate the antivirus software icon in the system tray (bottom-right corner of the screen).
- Right-click on the icon and choose the option to temporarily disable or exit the antivirus program.
- Confirm the action and check if the Gateway Recovery Management continues.
- If it still gets stuck, proceed to the next method.

Method 4: Perform a System Restore
- Restart your Acer laptop and repeatedly press the F8 key during startup.
- From the Advanced Boot Options menu, select “Repair Your Computer” and press Enter.
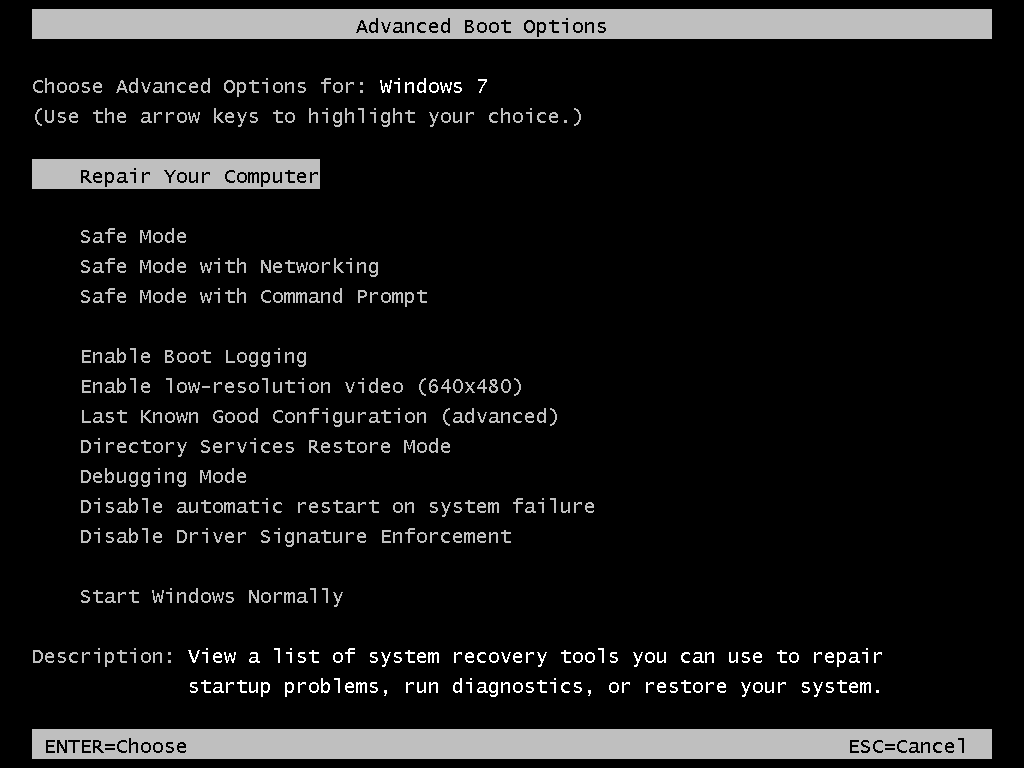
- Choose the keyboard layout and log in as an administrator if prompted.
- In the System Recovery Options, select “System Restore” and click Next.
- Select a restore point that predates the issue and follow the on-screen instructions to restore your system.
- Once the restore is complete, check if the Gateway Recovery Management works properly.
- If it doesn’t, proceed to the next method.
Method 5: Contact Acer Support
- If none of the above methods resolve the issue, it is recommended to contact Acer Support for further assistance.
- Provide them with detailed information about the problem and the steps you have already taken.
- Follow their instructions to troubleshoot or arrange for a repair if necessary.
python

import time
def recovery_management():
progress = 0
while progress < 100:
# Simulating recovery process
time.sleep(1) # Sleep for 1 second to simulate progress
progress += 1
print(f"Recovery progress: {progress}%")
print("Recovery completed successfully!")
# Calling the recovery management function
recovery_management()
This code demonstrates a simple recovery management tool that simulates progress until it reaches 100%. However, please note that this is a general example and may not directly address your specific prompt without further information.
Resolving Issues with Acer eRecovery Management
If you’re experiencing issues with Acer eRecovery Management getting stuck at 99% during a factory reset on your Gateway desktop running Windows 7, we have a solution.
1. File Copy: If the file copy process gets stuck, try deleting unnecessary files or folders to free up space on your hard drive.
2. Registration: Ensure that your Acer eRecovery Management is properly registered to avoid any compatibility issues.
3. Logo: If you encounter problems with the Acer logo appearing during the restore process, try restarting your system and attempting the recovery again.
4. Backup: Before performing a factory reset, it’s recommended to back up your important files and documents to avoid any data loss.
Fortect also identifies and repairs the causes of Blue Screen of Death (BSoD) errors, such as incompatible DLLs, drivers, and Windows bugs. Overall, Fortect ensures smooth running and recovery of the operating system without affecting user data.

Alternative Solutions for Acer Recovery
If your Gateway Recovery Management is stuck at 99% during a factory reset or Windows 7 restore, there are alternative solutions you can try.
1. File Copy and Delete: Firstly, try copying and deleting any files that may be causing the issue. This can help resolve any file system errors that may be hindering the recovery process.
2. Registration and Logo: Ensure that your Acer eRecovery is registered and that the Acer logo appears during the recovery process. If not, try re-registering the software and ensuring the logo is displayed.
3. Reordering Network Provider List: In some instances, reordering the network provider list can help resolve the stuck recovery issue. Go to the network settings and reorder the list to see if it makes a difference.
Fixes to Address Windows File Recovery Stuck Issues
- Ensure sufficient storage space: Check that you have enough free space on your hard drive or external storage device to complete the file recovery process.
- Update Windows: Make sure your Windows operating system is up to date with the latest patches and updates, as this can address any known issues that may be causing the file recovery process to get stuck.
- Disable antivirus software: Temporarily disable any antivirus or security software running on your computer, as these programs can sometimes interfere with the file recovery process.
- Check network connection: Ensure that you have a stable and reliable internet connection, as a weak or intermittent connection can lead to file recovery issues.
- Restart the computer: Sometimes, a simple restart can resolve temporary glitches or conflicts that may be causing the file recovery process to hang.
- Use alternative recovery methods: If the Windows File Recovery tool is consistently getting stuck, consider trying alternative file recovery software or methods to retrieve your lost files.

- Seek professional assistance: If all else fails, it may be necessary to consult a professional IT technician or data recovery specialist who can help diagnose and resolve the issues causing the file recovery process to stall.
Exploring Gateway Recovery Disk Options
table {
width: 100%;
border-collapse: collapse;
}
th, td {
padding: 8px;
text-align: left;
border-bottom: 1px solid #ddd;
}
th {
background-color: #f2f2f2;
}
Exploring Gateway Recovery Disk Options
| Option | Description |
|---|---|
| Factory Reset | Restores the computer to its original factory settings. |
| Windows 7 | Reinstalls Windows 7 operating system on your Gateway computer. |
| Restore | Restores the computer to a previously created restore point. |
| Acer Erecovery | Utilizes Acer’s recovery software for system restoration. |
| File Copy | Copies important files and data from the hard drive to another location. |
| Delete | Deletes files and data from the hard drive permanently. |
| Registration | Registers your Gateway computer with the appropriate authorities. |
| Logo | Allows you to customize the logo displayed during the recovery process. |
Restoring Windows on Gateway Computers
If you’re experiencing issues with Gateway Recovery Management getting stuck at 99% during a factory reset or Windows 7 restore, there are a few steps you can try to resolve the problem.
First, try deleting the registration files in the system setting. This can help reset the process and allow it to complete successfully.
If that doesn’t work, you can try copying and deleting some files manually. This involves accessing the Acer eRecovery partition and navigating to the File Storage folder. Copy the files to a backup location and then delete them from the original folder.
After completing these steps, restart your system and try the factory reset or restore process again. This should help resolve the issue and allow Gateway Recovery Management to complete successfully.
If you’re still experiencing problems, we recommend contacting Gateway support or reaching out to a professional for further assistance.
Beware of the potential issue where the Gateway Recovery Management may become stuck at 99%, causing delays and potential data loss. Download this tool to run a scan