Troubleshooting Intel HD Graphics Not Showing
Having trouble with your Intel HD Graphics not showing up? Let’s delve into the potential causes and effective solutions to troubleshoot this issue.
Troubleshooting Intel HD Graphics Control Panel
If you’re experiencing issues with the Intel HD Graphics Control Panel not showing up on your computer, follow these troubleshooting steps to resolve the problem:
1. Check for updates: Make sure you have the latest version of Intel Graphics Driver installed on your PC. Visit the Intel Download Center and search for your specific graphics card model. Download and install any available updates.
2. Restart your computer: Sometimes a simple restart can solve the issue. Restart your computer and check if the Intel HD Graphics Control Panel appears after the reboot.
3. Reinstall the graphics driver: If the Control Panel still doesn’t show up, try reinstalling the graphics driver. Open the Device Manager by right-clicking on the Start button and selecting “Device Manager.” Expand the “Display adapters” category, right-click on your Intel graphics card, and select “Uninstall device.” Restart your computer and Windows will automatically reinstall the driver.
4. Check for conflicting applications: Certain applications or utilities from other graphics card manufacturers (such as Nvidia or AMD) can conflict with the Intel HD Graphics Control Panel. Uninstall any third-party graphics software and restart your computer to see if the Control Panel appears.
5. Reset the graphics settings: If the Control Panel is still missing, you can try resetting the graphics settings to their default values. Right-click on your desktop and select “Graphics Options” or “Graphics Properties” from the context menu. Look for a “Reset” or “Restore Defaults” option and click on it.
If none of these steps resolve the issue, consider reaching out to Intel support for further assistance.
Additionally, if any DLL files related to your graphics are missing or corrupt, Fortect can automatically fix the issue. While it cannot guarantee a solution for every case, Fortect‘s comprehensive approach to repairing Windows issues may help resolve the problem.

Alternative Methods to Access Intel Graphics Control Panel
- Click on the Start button located at the bottom left corner of the screen.
- In the search bar, type Intel Graphics Control Panel and press Enter.
- The Intel Graphics Control Panel should appear in the search results. Click on it to open the control panel.
Method 2: Accessing Intel Graphics Control Panel through the System Tray
- Locate the Intel Graphics Control Panel icon in the system tray, usually located in the bottom right corner of the screen.
- Right-click on the icon to open a context menu.
- In the context menu, click on Graphics Properties or Graphics Options to open the Intel Graphics Control Panel.
Method 3: Accessing Intel Graphics Control Panel through the Desktop Context Menu
- Go to your desktop screen.
- Right-click on an empty area of the desktop to open a context menu.
- In the context menu, look for an option such as Graphics Options or Graphics Properties.
- Hover over the option and a sub-menu should appear. Click on it to open the Intel Graphics Control Panel.
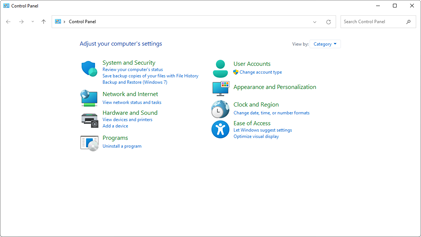
Method 4: Accessing Intel Graphics Control Panel through the Control Panel
- Click on the Start button located at the bottom left corner of the screen.
- Type Control Panel in the search bar and press Enter.
- In the Control Panel window, select Hardware and Sound.
- Under the Devices and Printers section, click on Device Manager.
- In the Device Manager window, expand the category of Display adapters.
- Right-click on the Intel graphics driver and select Properties.
- In the Properties window, click on the Intel Graphics Control Panel tab.
- Click on the Open button to access the Intel Graphics Control Panel.
Reinstalling and Updating Intel Graphics Drivers
![]()
To reinstall and update Intel Graphics Drivers, follow these steps:
Step 1: Open the Control Panel on your Windows operating system.
Step 2: Click on “Device Manager” to open it.
Step 3: In the Device Manager window, expand the “Display adapters” category.
Step 4: Right-click on the Intel Graphics driver and select “Uninstall device.” Follow the on-screen instructions to complete the uninstallation process.
Step 5: After uninstalling the driver, visit the Microsoft Store or the Intel website to download the latest version of the Intel Graphics driver for your specific device.
Step 6: Once the driver download is complete, open the downloaded file and follow the installation wizard to install the driver.
Step 7: Restart your computer to apply the changes.
By following these steps, you should be able to reinstall and update your Intel Graphics Drivers, resolving any issues with the graphics not showing properly on your personal computer. Remember to always keep your drivers up to date for the best performance and experience.
If you encounter any difficulties during the process, consult the Intel support website or reach out to their customer support for further assistance.
Making Changes from the Windows 11 Context Menu
To troubleshoot Intel HD Graphics not showing on your Windows 11, you can make changes from the Windows 11 context menu. Here’s how:
1. Right-click on the desktop to open the context menu.
2. Select “Display settings” from the menu.
3. In the Display settings window, click on “Advanced display settings” at the bottom.
4. Scroll down and click on “Display adapter properties.”
5. In the Adapter tab, click on “Properties.”
6. Go to the “Driver” tab and click on “Update Driver.”
7. Choose the option to “Search automatically for updated driver software.” Windows will search and install any available updates for your Intel HD Graphics.
8. If Windows doesn’t find any updates, you can also try downloading the latest driver from the Intel website and install it manually.
9. After updating the driver, restart your computer to apply the changes.
If the Intel HD Graphics still doesn’t show up, you can try the following additional steps:
1. Right-click on the desktop and select “Device Manager” from the context menu.
2. Expand the “Display adapters” category.
3. Right-click on the Intel HD Graphics and select “Uninstall device.”
4. Tick the box that says “Delete the driver software for this device” and click on “Uninstall.”
5. Restart your computer.
6. After the restart, Windows will automatically reinstall the driver for Intel HD Graphics.
7. Check if the Intel HD Graphics is now showing up in the Display settings.
If the issue persists, you may need to contact Intel support or seek assistance from a professional technician who can further diagnose the problem.
Please be aware that Intel HD Graphics may not be visible or displayed properly. Download this tool to run a scan