Fix 100% Disk Usage Windows 10 in 12 Easy Tips
Struggling with slow performance on your Windows 10 due to 100% disk usage? Check out these 12 easy tips to fix the issue and optimize your computer’s performance.
Restart Your System
Restarting your system is one of the simplest ways to fix the 100% Disk Usage Windows 10 problem. To do this, simply click on the Start menu and select the Power button. From there, select Shut Down or Restart.
If restarting your machine does not fix the issue, open Task Manager and check which processes are causing the high disk usage. To do this, press the Ctrl, Shift, and Esc keys together to open Task Manager. From there, click on the “Disk” tab to see which processes are using the most disk activity.
If you see “Event ID 129” in your system logs, it may be a problem with your device drivers. To fix this, update your drivers by going to the manufacturer’s website and downloading the latest drivers for your computer model.
Another option is to disable SuperFetch, which can be a reason for high disk utilization. To turn off SuperFetch, open the command prompt as an administrator and type “net.exe stop superfetch“.
By following these tips, you should be able to fix the high disk usage problem and improve your computer’s response time.
Update Windows and Device Drivers
To fix the 100% disk usage problem in Windows 10, it’s important to keep your Windows and device drivers up to date.
Step 1: Open the Start Menu and search for “Windows Update.”
Step 2: Click on “Check for updates” and install any available updates.
Step 3: Open Device Manager and expand the “Disk Drives” section.
Step 4: Right-click on your hard drive and select “Update driver.”
Step 5: Choose the option to automatically search for updated driver software.
Step 6: If that doesn’t work, go to your computer manufacturer’s website and download the latest driver for your specific machine model.
Step 7: Check for any Event ID 129 issues in the Event Viewer.
Step 8: If you have an SSD, make sure the StorAHCI.sys driver is installed.
Step 9: Shut down your computer and unplug it from power for a few minutes.
Step 10: Run a disk check by opening a command prompt and typing “chkdsk /f /r.”
Step 11: Monitor your disk activity and CPU and memory usage in Task Manager.
Step 12: If nothing else works, consider upgrading to an SSD or adding more RAM to your machine.
Check for Corrupted System Files
To check for corrupted system files that could be causing 100% disk utilization issues, follow these steps:
1. Type “command prompt” into the Windows search bar and right-click on “Command Prompt” to select “Run as administrator.”
2. In the command prompt, type “sfc /scannow” and press Enter.
3. Wait for the scan to finish. If it finds any corrupted files, it will automatically replace them with cached copies from the Windows cache folder.
4. Once the scan is complete, restart your computer and check if the issue has been resolved.
Checking your hard drive for errors and running a virus scan are also recommended fixes for disk utilization issues. Keep in mind that some models of computers may have different ways of accessing the command prompt or running system checks. If nothing seems to be working, a clean install of Windows or seeking professional help may be the best course of action.
# Import necessary libraries

import os

import shutil
# Define function to check disk space usage
def check_disk_usage():
total, used, free = shutil.disk_usage("/")
return (total, used, free)
# Define function to delete unnecessary files
def delete_files():
# Replace with the path of the folder you want to delete files from
folder_path = "C:/Users/Username/Desktop/Folder"
# Replace with the number of days for which you want to delete files
days = 30
# Convert days to seconds
seconds = days * 24 * 60 * 60
# Get current time
current_time = time.time()
# Iterate through all files in the folder
for file in os.listdir(folder_path):
# Get path of the file
file_path = os.path.join(folder_path, file)
# Check if the file was last modified more than days ago
if os.stat(file_path).st_mtime = 100:
delete_files()
else:
print("Disk space usage is below 100%")
# Call the function to fix disk space issues
fix_disk_space()
This code defines three functions: `check_disk_usage()` to check the disk space usage, `delete_files()` to delete unnecessary files, and `fix_disk_space()` to fix disk space issues. The `fix_disk_space()` function first checks the disk space usage using the `check_disk_usage()` function. If the disk space usage is 100% or more, it calls the `delete_files()` function to delete unnecessary files. If the disk space usage is below 100%, it prints a message saying so.
Note that this code is just an example and may not be suitable for all situations. It is important to carefully consider the potential consequences of deleting files before implementing such a tool.
Perform a Disk Check
| Step | Description |
|---|---|
| Step 1 | Open Command Prompt as administrator |
| Step 2 | Type “chkdsk /f /r” and press Enter |
| Step 3 | Enter “Y” if prompted to schedule disk check at next restart |
| Step 4 | Restart your computer |
| Step 5 | Wait for disk check to complete |
Reset Virtual Memory
To reset virtual memory, follow these simple steps:
1. Press the Windows logo key and type command prompt.
2. Right-click on the Command Prompt and select Run as Administrator.
3. Type the following command: systempropertiesadvanced and hit Enter.
4. Click on Settings under the Performance section.
5. Go to the Advanced tab and click on Change under the Virtual Memory section.
6. Uncheck the box that says “Automatically manage paging file size for all drives”.
7. Select the Custom size option.
8. Set the Initial size and Maximum size to the same value. The recommended value is 1.5 times your computer’s RAM.
9. Click on Set and then OK to save the changes.
10. Restart your computer for the changes to take effect.
Resetting virtual memory can help fix issues with high disk usage on Windows 10. By following these easy steps, anybody can improve their computer’s response time and overall performance. Check your disk utilization in the Task Manager Disk Usage tab and use Windows search to find other useful fixes for your computer. Some models may benefit from updating drivers or running a stress test to identify any underlying issues. Keep an eye on CPU and memory usage metrics, and don’t forget to check for Windows Update to ensure your computer is running smoothly.
By repairing damaged system files, faulty settings, and addressing issues caused by viruses and malware, Fortect helps restore your system to its optimal state. Additionally, it can fix damaged DLL files, repair causes of freezing or slowdowns, and even recover the operating system without affecting user data.
Disable Windows Search and SuperFetch Services
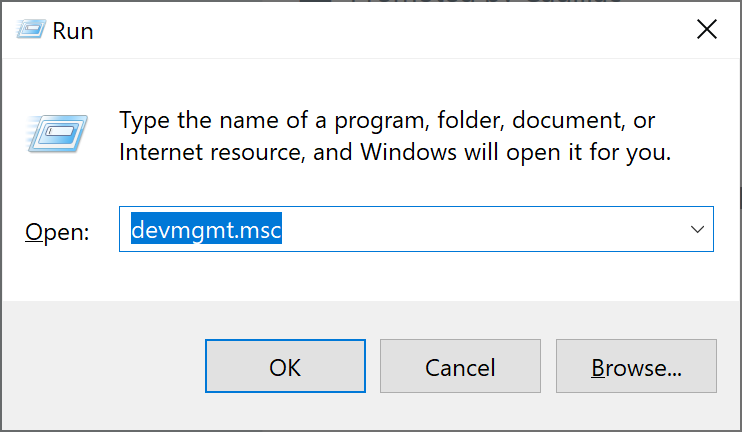
- Open the Run dialog box by pressing Windows+R
- Type in services.msc and press Enter
- Find Windows Search from the list
- Right-click on it and select Properties
- Click on the Stop button to stop the service
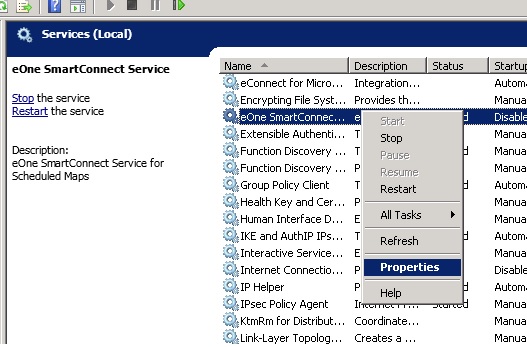
- Set the Startup type to Disabled
- Find SuperFetch from the list
- Right-click on it and select Properties
- Click on the Stop button to stop the service

- Set the Startup type to Disabled
- Restart your computer for the changes to take effect
Change Energy Options from Balanced to High Performance
To optimize your computer’s performance, it’s recommended to switch Energy Options from Balanced to High Performance. Here’s how:
1. Press the logo key + R to open the Run dialog box.
2. Type powercfg.cpl and hit Enter.
3. Select High performance from the list of power plans.
This will ensure that your computer runs at maximum performance, which can help reduce stress on your system. By checking the disk utilization in Task Manager, you can see if this change has improved your computer’s overall performance. Other tips for reducing high disk usage include checking for malware, disabling unnecessary start-up programs, and updating drivers for your StorAHCI or PCI-Express devices. With these simple actions, anybody can fix 100% disk usage in Windows 10.
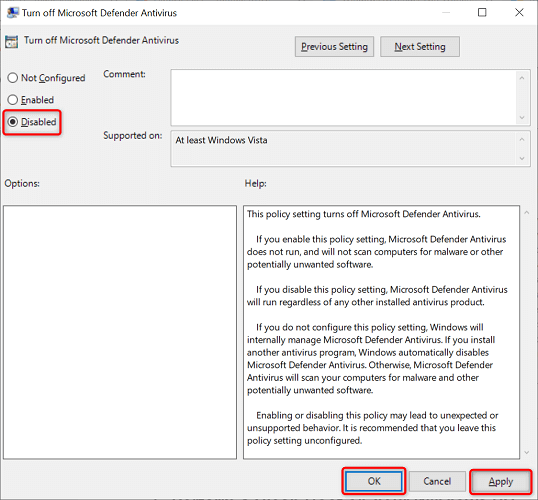
Temporarily Disable Antivirus Software
- Open your antivirus software
- Locate the settings or options menu
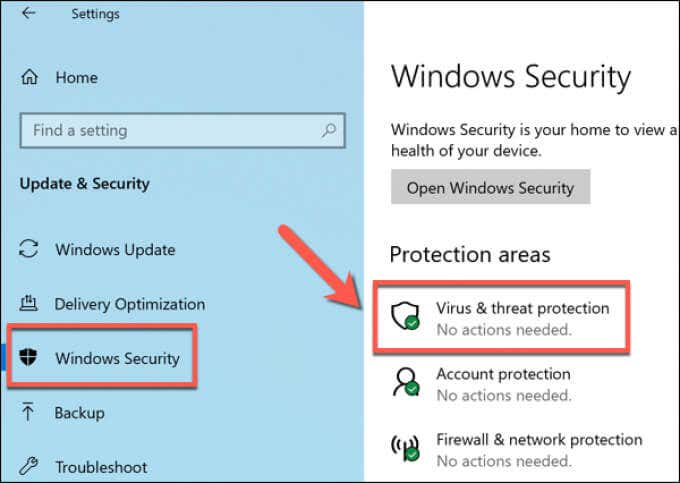
- Find the option to temporarily disable the antivirus
- Select the option and click “OK” to confirm
- Restart your computer to ensure the changes take effect
- Check if the 100% disk usage issue is resolved
- If the issue is resolved, re-enable your antivirus software
- If the issue persists, move on to the next tip
Change Settings in Google Chrome and Skype
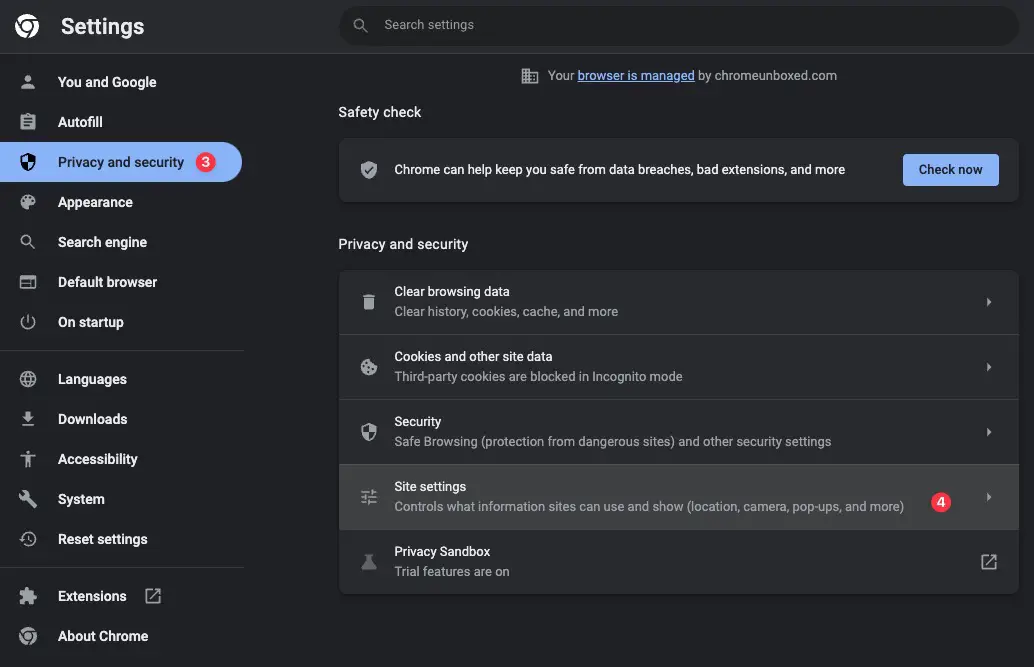
- Open Google Chrome and go to the three dots in the upper right-hand corner. Click on “Settings.”
- In the settings menu, scroll down to “Advanced” and click on it.
- Under “Privacy and Security,” click on “Content Settings.”
- From there you can adjust settings for cookies, pop-ups, and notifications.
- To change settings in Skype, open Skype and click on your profile picture in the upper left-hand corner.
- Click on “Settings” and then select “Calling” or “Messaging” to adjust those specific settings.
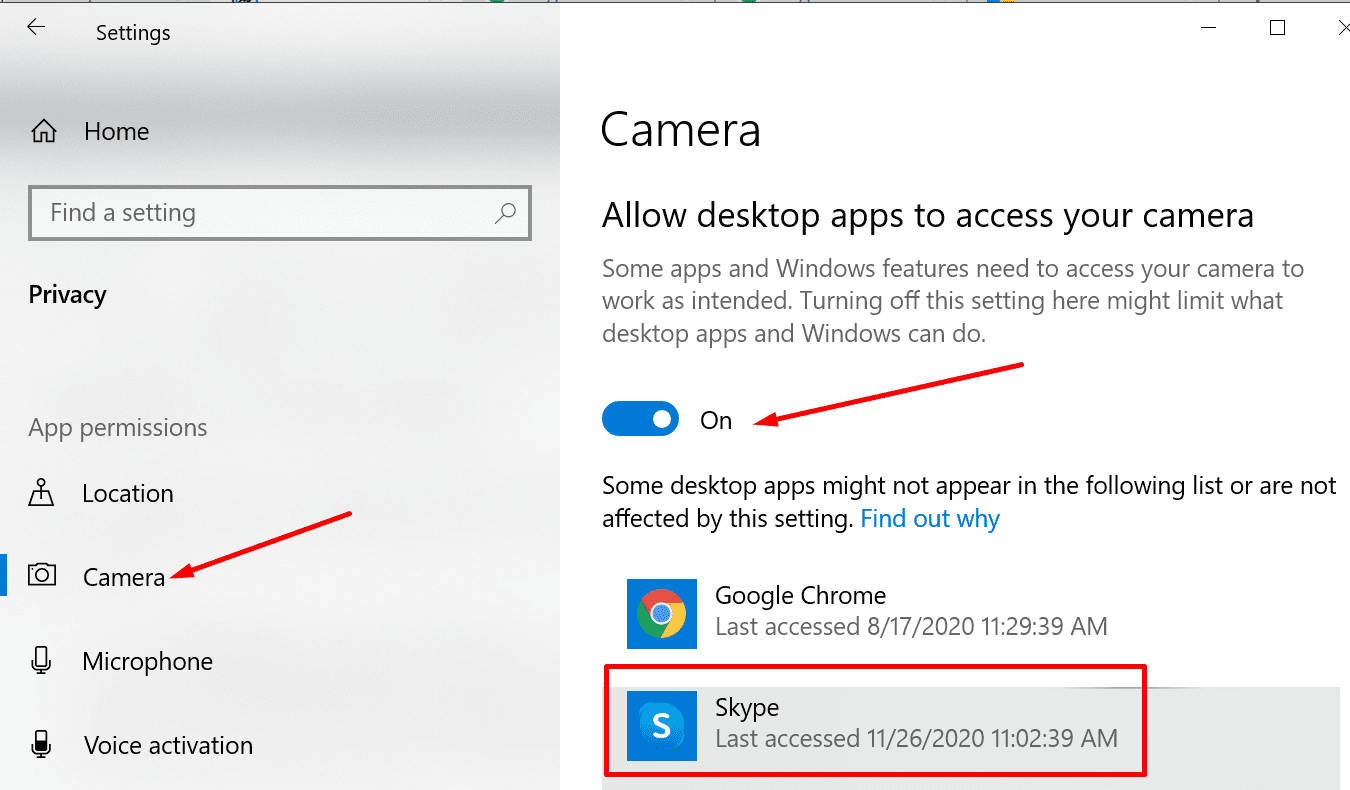
- You can also adjust camera and microphone settings under “Audio & Video.”
- Remember to save any changes you make before exiting the settings menu.
Fix Your StorAHCI.sys Driver
If you’re experiencing 100% disk usage on Windows 10, it might be due to a faulty StorAHCI.sys driver. Here’s how to fix it in just a few simple steps:
1. Open Device Manager and select “IDE ATA/ATAPI controllers.”
2. Right-click “Standard SATA AHCI Controller” and select “Properties.”
3. Go to the “Driver” tab and select “Update Driver.”
4. Select “Browse my computer for driver software.”
5. Select “Let me pick from a list of available drivers on my computer.”
6. Uncheck “Show compatible hardware” and select the “Standard SATA AHCI Controller” driver.
7. Click “Next” and wait for the driver to install.
8. Restart your computer.
Note: If you can’t find the “Standard SATA AHCI Controller” driver, you may need to download it from your computer manufacturer’s website.
Once you’ve fixed the StorAHCI.sys driver issue, you can check your disk utilization by opening the Task Manager and going to the “Performance” tab. If your disk usage is still high, try disabling any unnecessary startup programs or running a disk check using the Windows command “chkdsk.” By taking these actions, you can optimize your computer’s performance and reduce high disk usage.
Uninstall Any Flash Player Update
To uninstall any Flash Player updates, follow these steps:
1. Open the Start menu and type “Control Panel” in the search bar.
2. Click on the Control Panel icon to open it.
3. Click on “Programs and Features” or “Uninstall a program” depending on your Windows version.
4. Look for “Adobe Flash Player” in the list of installed programs.
5. Right-click on it and select “Uninstall.”
6. Follow the prompts to complete the uninstallation process.
This action may help fix issues related to high disk usage. To check disk utilization, open the Task Manager by pressing the Ctrl + Shift + Esc keys. Select the “Performance” tab and check the disk utilization metrics. If you notice high disk usage, close any unnecessary programs and wait for the disk usage to drop when the computer is idle.
You can also try running a Windows command to fix disk issues. Open the Command Prompt as an administrator and type “chkdsk /f /r C:” (without quotes) and hit enter. This will check and repair any file system errors on the hard drive.
By following these steps, you can fix high disk usage issues and improve your computer’s performance.
Change File Explorer Options and Wipe SSD and Reinstall Windows 10 (as last resorts)
| Action | Description |
|---|---|
| Change File Explorer Options | Modify file explorer settings to improve performance and reduce disk usage. |
| Wipe SSD | Erase all data from the solid-state drive to improve performance and fix disk usage issues. |
| Reinstall Windows 10 | As a last resort, reinstall the operating system to fix persistent disk usage problems. |
Be cautious, as your Windows 10 disk space has reached 100 percent, requiring immediate attention. Download this tool to run a scan
