How to Fix DNS Server Not Responding Error
Unraveling the Mysteries of DNS Server Not Responding: Simple Solutions Await
Understanding the “DNS Server Not Responding” Error
If you’re experiencing the “DNS Server Not Responding” error, it means that your computer is having trouble connecting to the Domain Name Server (DNS) that translates domain names into IP addresses. This issue can prevent you from accessing websites and can be frustrating to deal with.
There are several possible reasons for this error, including problems with your DNS server address, router, network adapter driver, or even issues with your Internet service provider.
To fix this error, try the following solutions:
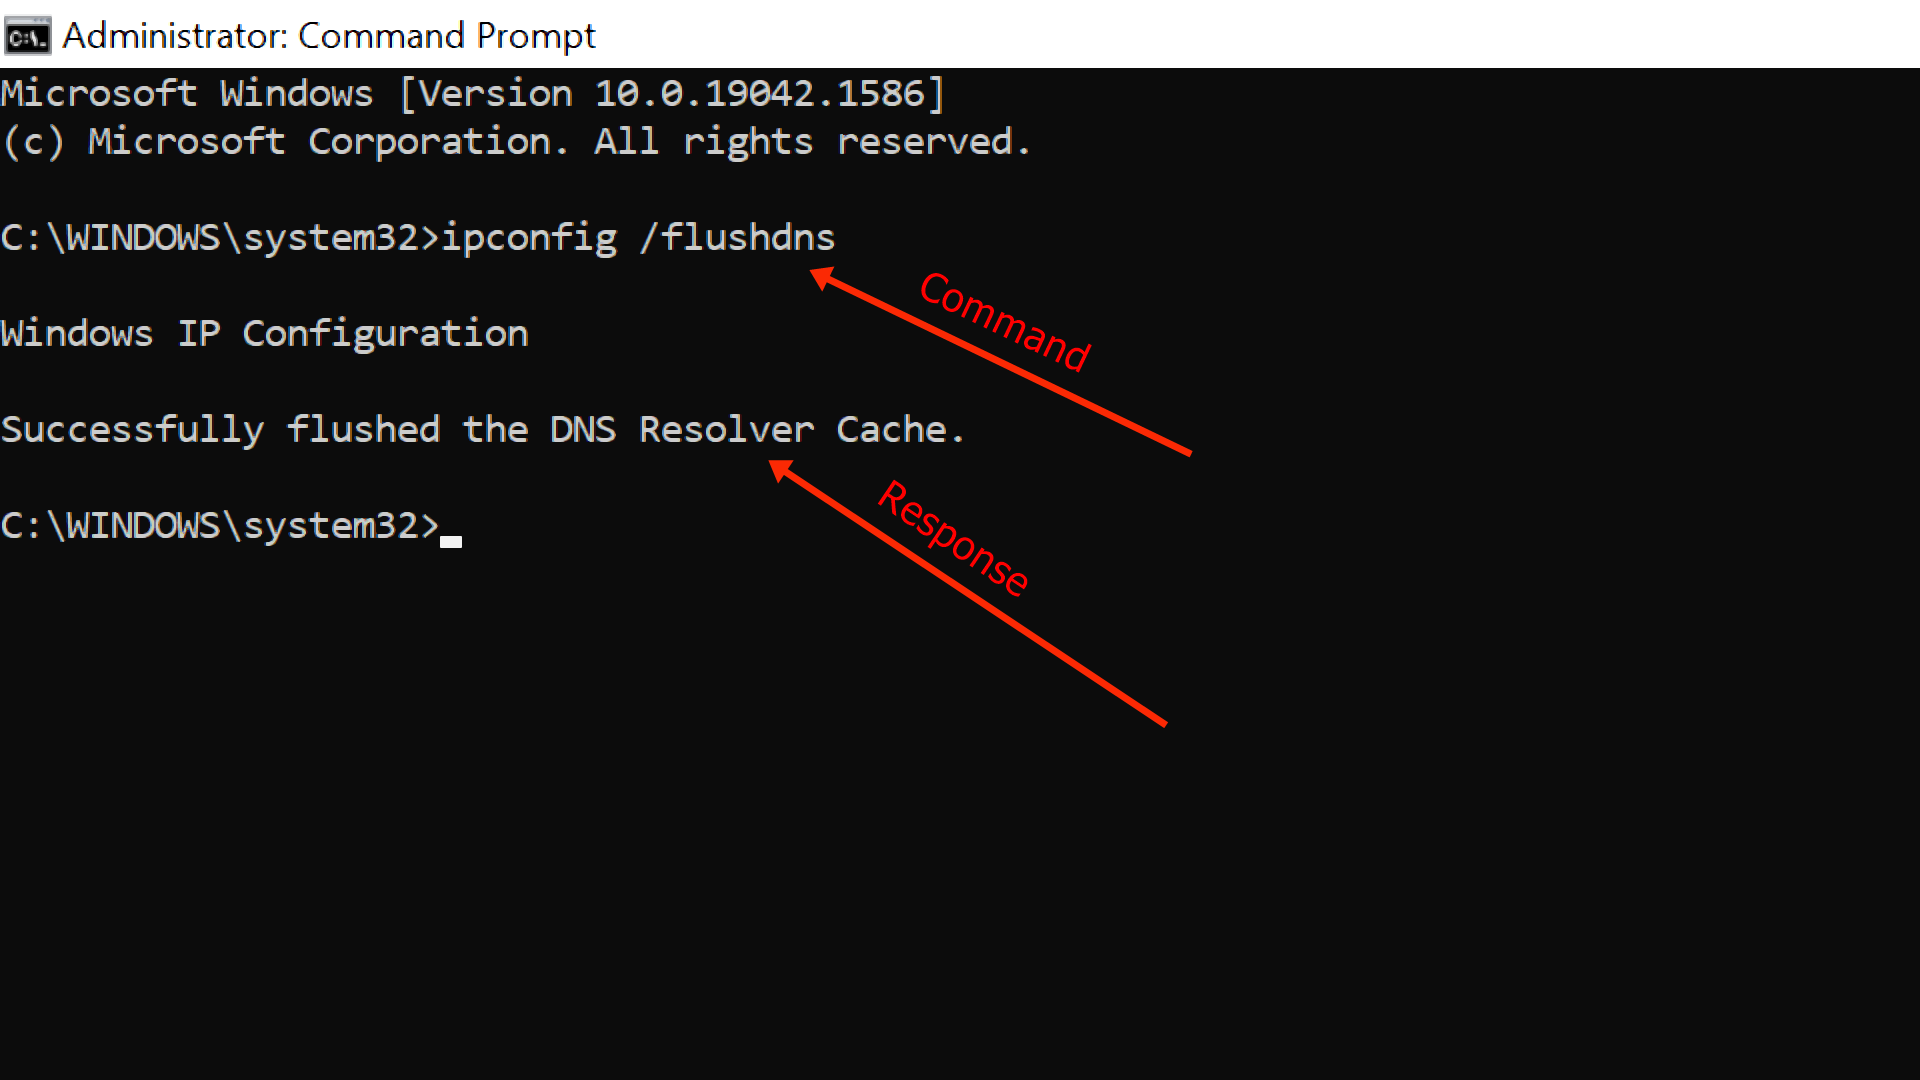
1. Flush the DNS cache: Open the command prompt and type “ipconfig /flushdns” to clear the DNS cache.
2. Change DNS server: Update your DNS server address to a different one, such as Google’s DNS (8.8.8.8 and 8.8.4.4).
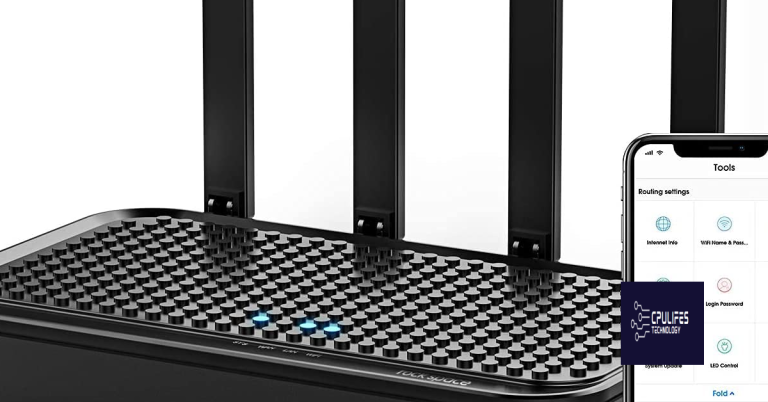
3. Reset your router: Power off your router, wait for a few minutes, and then power it back on.
4. Update network adapter driver: Make sure you have the latest driver installed for your network adapter.
Switching to a Different Browser
If you’re experiencing the DNS Server Not Responding error, switching to a different browser can potentially resolve the issue. This problem can occur due to various reasons, such as network problems or incorrect DNS settings. By using a different browser, you can determine if the issue is specific to your current browser or if it’s a more widespread problem.
To switch to a different browser, follow these steps:
1. Open the Start menu and search for “Control Panel.”
2. Click on “Control Panel” to open it.
3. In the Control Panel, locate and click on “Programs” or “Programs and Features.”
4. Look for your current browser in the list of installed programs and select it.
5. Click on “Uninstall” or “Remove” to uninstall the browser.
6. Once the uninstallation is complete, go to your preferred browser’s official website.
7. Download and install the browser by following the on-screen instructions.
After switching to a different browser, try accessing websites to see if the DNS Server Not Responding error is resolved. If the issue persists, there may be other underlying causes that need to be addressed.
Connecting with a Different Device
If you’re experiencing a DNS Server Not Responding error on your computer, you may be able to resolve the issue by connecting with a different device. This can help determine if the problem is specific to your computer or if it’s a broader network issue.
To connect with a different device, follow these steps:
1. Find an alternative device, such as a smartphone or tablet.
2. Connect this device to the same network that your computer is using.
3. Open a web browser on the alternative device and try accessing a website.
4. If the website loads successfully on the alternative device, it indicates that the issue is likely with your computer and not the network.
5. In this case, you can proceed with the other troubleshooting methods mentioned in this article to fix the DNS Server Not Responding error on your computer.
By connecting with a different device, you can narrow down the cause of the DNS error and focus your troubleshooting efforts on your computer specifically.
Starting Your Computer in Safe Mode
To start your computer in Safe Mode and fix the DNS Server Not Responding error, follow these steps:
1. Press the Windows key and R simultaneously to open the Run dialog box.
2. Type “msconfig” and press Enter to open the System Configuration window.
3. In the System Configuration window, go to the Boot tab.
4. Check the “Safe boot” option and select “Network” from the options below.
5. Click Apply and then OK.
6. Restart your computer.
Your computer will now start in Safe Mode with network access. This will help troubleshoot any network-related issues, including DNS errors.
In Safe Mode, you can try the following methods to fix the DNS Server Not Responding error:
1. Restart your router and modem.
2. Update your network drivers.
3. Reset your DNS settings.
4. Temporarily disable your antivirus and firewall.
5. Use a different DNS server.
These steps should help resolve your DNS Server Not Responding error and restore your internet connection.
Temporarily Disabling Antivirus Software and Firewall
To temporarily disable your antivirus software and firewall in Windows 10, follow these steps:
1. Press the Windows key and R simultaneously to open the Run dialog box.
2. Type “msconfig” in the box and click OK.
3. In the System Configuration window, go to the Services tab.
4. Check the box next to “Hide all Microsoft services” to avoid disabling essential services.
5. Uncheck the boxes next to your antivirus software and firewall.
6. Click Apply and then OK to save the changes.
7. Restart your computer for the changes to take effect.
Disabling your antivirus software and firewall can help troubleshoot DNS server not responding errors caused by network problems. However, it’s essential to re-enable them after resolving the issue to maintain your computer’s security.
If you’re using Windows 7, the process is similar. Open the Run dialog box, type “msconfig,” go to the Services tab, and disable your antivirus software and firewall.
Disabling Secondary Connections
To fix the DNS Server Not Responding error on Windows 10, you may need to disable secondary connections. This error occurs when your computer is unable to access the Domain Name Server (DNS), which is responsible for translating domain names into IP addresses.
To disable secondary connections, follow these steps:
1. Open the Command Prompt by pressing the Windows key + R, then typing “cmd” and pressing Enter.
2. In the Command Prompt window, type “netsh interface ipv4 set dnsservers name=”YOUR CONNECTION NAME” source=dhcp validate=no” and press Enter. Replace “YOUR CONNECTION NAME” with the name of your connection (e.g., Wi-Fi or Ethernet).
3. Restart your computer and check if the DNS Server Not Responding error is resolved.
Disabling secondary connections can help fix DNS errors and resolve the “dns failure” or “service unavailable” messages you may encounter when accessing web sites. Remember to properly configure your primary DNS settings and ensure your device and resource DNS are correctly set.
Bonus Tip: If you’re using a Mac, you can follow similar steps by accessing the Network settings and adjusting the DNS configuration.
By repairing damaged system files and faulty settings, Fortect can resolve issues that cause normal tasks to stop working or result in confusing error messages. Additionally, it can address issues related to missing or corrupt DLL files, ensuring the proper functioning of programs.
Disabling the Windows Peer-to-Peer Feature
To disable the Windows Peer-to-Peer feature, follow these steps:
1. Open the Control Panel by pressing the Windows key + X and selecting “Control Panel” from the menu.
2. In the Control Panel, click on “Network and Internet” and then “Network and Sharing Center.”
3. On the left-hand side, click on “Change adapter settings.”
4. Right-click on your network connection and select “Properties.”
5. In the Properties window, scroll down and find “Internet Protocol Version 4 (TCP/IPv4).” Select it and click on the “Properties” button.
6. In the TCP/IPv4 Properties window, click on the “Advanced” button.
7. In the Advanced TCP/IP Settings window, click on the “WINS” tab.
8. Under the “NetBIOS setting” section, select “Disable NetBIOS over TCP/IP.”
9. Click “OK” to save the changes.
Disabling the Windows Peer-to-Peer feature can help resolve DNS server not responding errors by eliminating potential conflicts with the network.
Restarting Your Router
Restarting your router can often fix the “DNS Server Not Responding” error, which may be causing connection problems. Here’s how to do it:
1. Locate your router and power it off by unplugging it from the power source.
2. Wait for about 30 seconds.
3. Plug the router back in and let it power on completely.
4. Once the router is fully powered on, restart your computer.
5. Check if the error message still appears when accessing a website.
If the error persists, try these additional steps:
1. Ensure your router’s DNS settings are correctly configured. Consult your router’s manual or contact your internet service provider for assistance.
2. If you’re using a Mac, go to System Preferences > Network > Advanced > DNS and remove any DNS servers listed there.
3. If you’re using Windows 7, go to Control Panel > Network and Internet > Network and Sharing Center > Change adapter settings. Right-click on your network connection, select Properties, and under the Networking tab, select Internet Protocol Version 4 (TCP/IPv4) and click on Properties. Ensure that “Obtain DNS server address automatically” is selected.
These troubleshooting steps should help resolve the “DNS Server Not Responding” error and restore your internet connection.
Installing Updated Network Adapter Drivers
To fix the DNS Server Not Responding error, you may need to update your network adapter drivers. This error occurs when the DNS server that translates domain names into IP addresses is not able to respond to your computer’s request.
To resolve this issue, follow these steps:
1. Press the Windows key + X and select Device Manager.
2. Expand the Network adapters category.
3. Right-click on your network adapter and select Update driver.
4. Choose “Search automatically for updated driver software” and follow the on-screen instructions.
5. Restart your computer after the driver update is complete.
Updating your network adapter drivers can help resolve DNS server issues by ensuring that your device can properly communicate with the DNS server. This should improve your internet connection and allow you to access websites without any DNS-related errors.
Flushing DNS Cache and Resetting IP
- Open the Command Prompt by pressing the Windows key and typing cmd.
- Right-click on Command Prompt and select Run as administrator.
- In the Command Prompt, type ipconfig /flushdns and press Enter.
- Wait for the message that confirms the DNS cache has been successfully flushed.

- Close the Command Prompt window.
Resetting IP:
- Press the Windows key and type cmd to open the Command Prompt.
- Right-click on Command Prompt and select Run as administrator.
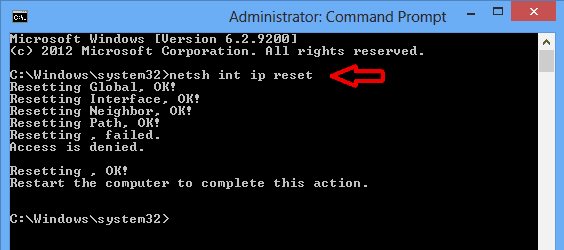
- In the Command Prompt, type netsh int ip reset and press Enter.
- Wait for the command to complete and restart your computer.

Disabling IPv6
If you are experiencing the “DNS Server Not Responding” error, disabling IPv6 may help resolve the issue.
To disable IPv6, follow these steps:
1. Press the Windows key + R to open the Run dialog box.
2. Type “ncpa.cpl” and press Enter to open the Network Connections window.
3. Right-click on your active network connection and select Properties.
4. Scroll down and uncheck the box next to “Internet Protocol Version 6 (TCP/IPv6)”.
5. Click OK to save the changes.
Disabling IPv6 can help fix DNS server-related connection problems, as it forces your computer to use IPv4 instead. However, keep in mind that this solution may not work for every situation.
Changing the Default DNS Server on Windows
To change the default DNS server on Windows and fix the DNS Server Not Responding error, follow these steps:
1. Open the Control Panel by pressing the Windows key + X and selecting “Control Panel” from the menu.
2. Click on “Network and Internet” and then “Network and Sharing Center.”
3. In the left-hand menu, click on “Change adapter settings.”
4. Right-click on the network connection you are using and select “Properties.”
5. In the properties window, scroll down and double-click on “Internet Protocol Version 4 (TCP/IPv4).”
6. In the next window, select “Use the following DNS server addresses.”
7. Enter the preferred DNS server and alternate DNS server addresses. You can use public DNS servers like Google DNS (8.8.8.8 and 8.8.4.4) or OpenDNS (208.67.222.222 and 208.67.220.220).
8. Click “OK” to save the changes.
By changing the default DNS server, you can resolve DNS Server Not Responding errors and improve your internet connection.
Investigating Network Issues
If you are experiencing network issues and receiving a “DNS Server Not Responding” error, there are a few steps you can take to resolve the problem.
First, check your internet connection and ensure that it is working properly. Sometimes, a simple restart of your modem or router can fix the issue.
If the problem persists, try resetting your DNS settings. Open the Command Prompt by pressing the Windows key + R, then type “cmd” and press Enter. In the Command Prompt window, type “ipconfig /flushdns” and press Enter. This will clear the DNS cache on your computer.
If the issue still persists, you may need to change your DNS server. You can do this by going to your network adapter settings and manually entering a different DNS server address. Google Public DNS (8.8.8.8) and Cloudflare DNS (1.1.1.1) are popular options.
If none of these solutions work, it is possible that the issue lies with your ISP or the website you are trying to access. Contact your ISP for further assistance or try accessing a different website to determine if the problem is specific to one site.
How to Fix DNS Server Not Responding Error
Manually Setting DNS Server
If you are facing DNS Server Not Responding error, you can try manually setting the DNS server on your computer or network device. Follow the steps below:
| Operating System | Steps to Set DNS Server |
|---|---|
| Windows | 1. Open the Control Panel 2. Go to Network and Internet settings 3. Click on Network and Sharing Center 4. Select your active network connection 5. Click on Properties 6. Select Internet Protocol Version 4 (TCP/IPv4) 7. Click on Properties 8. Choose “Use the following DNS server addresses” 9. Enter the preferred and alternate DNS server addresses provided by your ISP or a public DNS service like Google DNS (preferred: 8.8.8.8, alternate: 8.8.4.4) 10. Click OK and close the settings |
| MacOS | 1. Open System Preferences 2. Click on Network 3. Select your active network connection (Wi-Fi or Ethernet) 4. Click on Advanced 5. Go to the DNS tab 6. Click on the “+” button to add a new DNS server 7. Enter the preferred DNS server address provided by your ISP or a public DNS service like Google DNS (e.g., 8.8.8.8) 8. Click OK and close the settings |
| Linux | 1. Open the Terminal 2. Enter the command: sudo nano /etc/resolv.conf 3. Add the following lines to the file: – nameserver 8.8.8.8 (preferred DNS server) – nameserver 8.8.4.4 (alternate DNS server) 4. Save the file and exit the editor |
After manually setting the DNS server, restart your computer or network device to apply the changes. This may help resolve the DNS Server Not Responding error.
Please be cautious as you may experience internet connection issues due to a DNS server not responding. Download this tool to run a scan


