Troubleshooting Windows 10 Laptop WiFi Not Turning On
Having trouble turning on the WiFi on your Windows 10 laptop? Here’s how to troubleshoot the issue.
Verify the WiFi Switch or Button Is On
To troubleshoot a Windows 10 laptop WiFi not turning on, the first step is to verify that the WiFi switch or button is turned on. Locate the WiFi switch or button on your laptop, which is typically located on the sides or front of the device. Once you’ve found it, make sure it is in the “on” position to enable the wireless network connection.
If you are unable to find the physical switch or button, you can also check the WiFi settings on your laptop. To do this, click on the WiFi icon in the system tray at the bottom right corner of the screen. This will open a list of available networks, and you can ensure that the WiFi is turned on here as well.
Additionally, you can check the WiFi settings in the Windows 10 settings menu. To access this, click on the Start button and then select “Settings”. From there, navigate to the “Network & Internet” section and select “WiFi” from the left-hand menu. Here, you can verify that the WiFi switch or button is turned on.
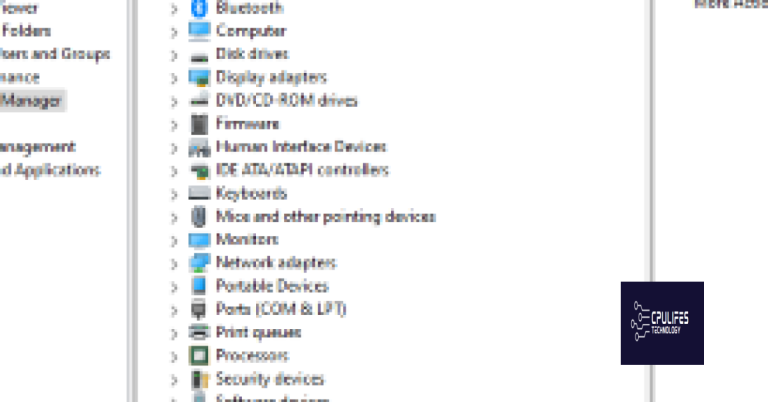
If you have verified that the WiFi switch or button is on and your laptop still won’t connect to the wireless network, you may need to troubleshoot further by checking for any device driver issues. This can be done by right-clicking on the Start button and selecting “Device Manager”. Look for the “Network Adapters” section and expand it to see if there are any issues with the WiFi adapter.
If you find any issues, you can try updating the device driver by right-clicking on the WiFi adapter and selecting “Update driver”. You can also try uninstalling the device driver and then restarting your laptop to allow Windows 10 to reinstall the driver automatically.
In some cases, there may be software or settings on your laptop that are preventing the WiFi from turning on. You can try running the built-in Windows 10 network troubleshooter to identify and fix any issues. To do this, click on the Start button and then select “Settings”, followed by “Update & Security” and “Troubleshoot”. From there, select the “Internet Connections” troubleshooter and follow the on-screen instructions.
By verifying that the WiFi switch or button is on and troubleshooting any potential issues with the device driver or settings, you can work towards resolving the issue of your Windows 10 laptop WiFi not turning on. If you continue to experience problems, it may be helpful to seek assistance from a professional or reach out to the manufacturer for further support.
Reboot Your Computer and Router
To do this, first, shut down your computer completely. Once the computer is off, unplug your router from the power source. Wait for about 30 seconds, then plug the router back in and power it on. After the router has fully restarted, turn your computer back on and see if the Wi-Fi is now working.
If rebooting your computer and router doesn’t solve the issue, you can also try resetting the network adapter. To do this, go to your Windows Settings, then navigate to Network & Internet and select Network reset. Follow the on-screen prompts to reset your network settings and see if this resolves the Wi-Fi problem.
Another troubleshooting step you can take is to check for driver updates for your network adapter. Sometimes outdated or corrupted drivers can cause Wi-Fi connectivity issues. To do this, go to Device Manager by right-clicking on the Start button and selecting Device Manager. Expand the Network adapters section, right-click on your Wi-Fi adapter, and select Update driver. Follow the prompts to search for and install any available driver updates.
If updating the driver doesn’t resolve the issue, you can also try uninstalling and reinstalling the network adapter. In Device Manager, right-click on your Wi-Fi adapter and select Uninstall device. After the device is uninstalled, restart your computer and Windows will automatically reinstall the network adapter. This can sometimes fix connectivity issues caused by corrupted driver files.
In some cases, issues with the Windows network stack can cause Wi-Fi problems. You can reset the network stack by opening an administrator command prompt and entering the following commands:
– netsh winsock reset
– netsh int ip reset
– ipconfig /release
– ipconfig /renew
After running these commands, restart your computer and see if the Wi-Fi is now functioning properly.
If none of these troubleshooting steps solve the issue, it’s possible that there may be a hardware problem with your Wi-Fi adapter. In this case, you may need to contact the manufacturer for support or consider purchasing a new network adapter.
Utilize the Network Adapter Troubleshooter
To access the Network Adapter Troubleshooter, first, click on the Start button and select Settings. Then, go to Update & Security > Troubleshoot > Additional troubleshooters. Look for Network Adapter and click on it to run the troubleshooter.
The Network Adapter Troubleshooter will then scan for any issues with your network adapter and attempt to fix them. Follow the on-screen instructions to complete the troubleshooting process.
If the troubleshooter is unable to resolve the issue, you may need to try other troubleshooting methods such as updating your network adapter drivers, resetting the network settings, or restarting your router.
Keep in mind that if the issue persists, it may be a hardware problem, and you may need to contact your laptop manufacturer for further assistance.
However, if the issue is specifically related to the laptop’s wifi not turning on, Fortect may not be able to fix this particular issue.

Update Your Network Adapter Driver
1. First, determine the model of your network adapter. You can find this information by right-clicking on the Start menu and selecting “Device Manager.” Then, expand the “Network adapters” category to see the name of your network adapter.
2. Once you have the model name, open your web browser and go to the manufacturer’s website. Look for the “Support” or “Downloads” section, and then search for the driver for your specific network adapter model.
3. Download the latest driver for your network adapter and save it to a location on your laptop that is easy to access, such as the desktop or Downloads folder.
4. Next, right-click on the Start menu and select “Device Manager” again. Find your network adapter in the list, right-click on it, and select “Update driver.”
5. Choose “Browse my computer for driver software,” then navigate to the location where you saved the downloaded driver. Select the driver file and follow the on-screen instructions to install it.
6. After the installation is complete, restart your laptop to apply the changes.
By updating your network adapter driver, you may be able to resolve issues with your WiFi not turning on. If this does not solve the problem, you may need to troubleshoot further or seek assistance from a professional.
Uninstall and Reinstall the Network Adapter Driver
To uninstall the network adapter driver, you will need to access the Device Manager. You can do this by pressing the Windows key + X and selecting “Device Manager” from the context menu.
Once in the Device Manager, locate the “Network adapters” section and expand it. Right-click on the network adapter that is causing the issue and select “Uninstall device.”
Follow the on-screen instructions to complete the uninstallation process.
After uninstalling the driver, you will need to reinstall it. To do this, you can either use a tool such as a driver update software or download the driver from the manufacturer’s website.
If you choose to download the driver from the manufacturer’s website, make sure to select the correct driver for your specific network adapter model and Windows 10 version.
Once you have downloaded the driver, you can install it by double-clicking on the downloaded file and following the on-screen instructions.
Restart your laptop after the installation is complete to apply the changes.
After restarting your laptop, check to see if the WiFi is now turning on. If the issue persists, you may need to troubleshoot further or seek additional support from the manufacturer or a professional technician.
By uninstalling and reinstalling the network adapter driver, you can often resolve issues related to the WiFi not turning on in Windows 10. This simple troubleshooting step can help ensure that your network adapter driver is functioning properly and may resolve any conflicts or errors that were causing the issue.
Check WLAN AutoConfig Service Status
To check the WLAN AutoConfig service status on your Windows 10 laptop, you can follow these steps. First, press the Windows key + R to open the Run dialog box. Then, type “services.msc” and press Enter to open the Services window.
Next, scroll down the list of services and look for “WLAN AutoConfig.” Once you find it, you can check its status. If the status is “Running,” then the service is active. If it’s not running, you can right-click on the service and select “Start” from the context menu to activate it.
If the WLAN AutoConfig service is already running but you’re still experiencing issues with your WiFi not turning on, you may need to restart the service. You can do this by right-clicking on the service and selecting “Restart” from the context menu.
If restarting the service doesn’t resolve the issue, you may need to reset the WLAN AutoConfig service. To do this, you can use the Command Prompt. Press the Windows key + X to open the Power User menu and select “Command Prompt (Admin).” Then, type the following command and press Enter: netsh wlan stop hostednetwork
After running the command, you can check the WLAN AutoConfig service status again to see if the issue has been resolved. If not, you may need to consider other troubleshooting steps such as updating your network adapter drivers or performing a system restore.
By checking the WLAN AutoConfig service status and taking appropriate action, you can troubleshoot and resolve issues with your Windows 10 laptop WiFi not turning on.
Perform a System Restore
First, access the System Restore tool by typing “system restore” in the search bar and selecting “Create a restore point” from the results.
Next, click on the “System Restore” button and follow the on-screen instructions to choose a restore point from a date when your WiFi was working properly.
Once the system restore is complete, restart your laptop and check if the WiFi is now turning on.
If the issue persists, you may need to consider other troubleshooting steps such as updating your network adapter drivers, checking for physical hardware issues, or performing a clean uninstall and reinstall of your WiFi adapter.
Remember to always back up your important files before performing a system restore, as this process may result in the loss of any data created or modified after the selected restore point.
If you continue to experience issues with your Windows 10 laptop WiFi not turning on, it may be best to seek professional assistance to diagnose and resolve the problem.
Toggle Airplane Mode On and Off
- Click on the Network icon on the taskbar.
- Turn on Airplane Mode by clicking the Airplane Mode button.
- Wait for a few seconds and then turn off Airplane Mode by clicking the Airplane Mode button again.
- Check if the WiFi is now turning on.
Be cautious, as some users have reported that their laptop wifi won’t turn on after updating to Windows 10. Download this tool to run a scan