Troubleshoot Boot Camp Assistant problems, failed installation, fix Windows 10
Welcome to this article where we dive into the world of Boot Camp Assistant, exploring the common problems faced during installation and how to effectively troubleshoot them. Get ready to unravel the mysteries and conquer the obstacles that may arise when installing Windows 10 using Boot Camp Assistant.
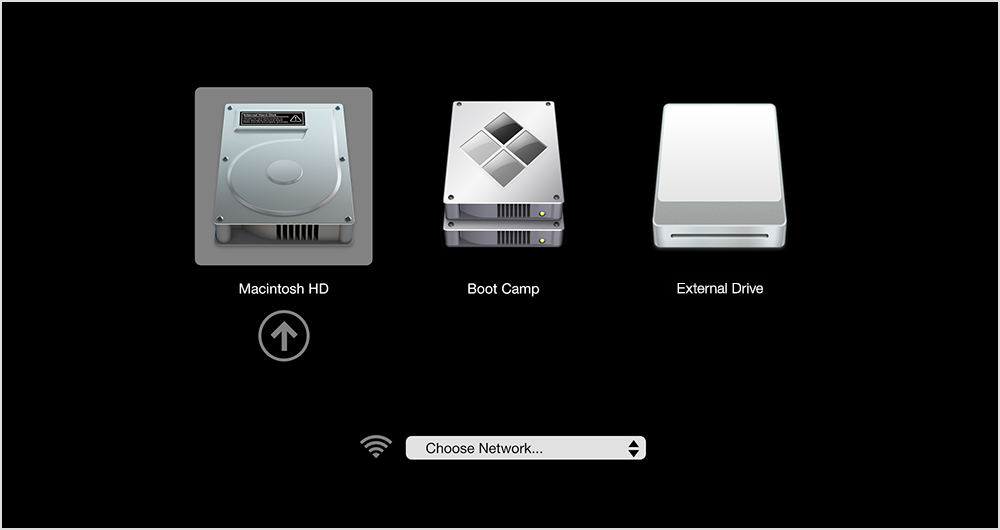
Boot Camp Assistant User Guide
Troubleshoot Boot Camp Assistant problems and fix Windows 10 installation
Encountering issues with Boot Camp Assistant or a failed Windows 10 installation? Follow these troubleshooting steps to resolve the problem.
1. Update macOS: Make sure you’re running the latest version of macOS to ensure compatibility.
2. Check system requirements: Ensure that your Mac meets the requirements for running Windows 10.
3. Verify Windows 10 ISO file: Make sure the Windows 10 ISO file you’re using is not corrupted.
4. Create a bootable USB drive: Use Boot Camp Assistant to create a bootable USB drive with the Windows 10 ISO.
5. Install Windows Support Software: After installing Windows, use the Boot Camp Assistant to install the necessary drivers.
6. Check storage space: Ensure you have enough free space on your Mac’s drive and on the USB drive.
7. Check internet connection: A stable internet connection is required during the installation process.
8. Disable FileVault and Firewall: Temporarily disable FileVault and any firewall software before installing Windows.
If you encounter an error message or any other issue during the process, refer to the appropriate troubleshooting section in the Boot Camp Assistant User Guide for further solutions.
Why is Boot Camp Assistant Failing?
Boot Camp Assistant failing to install Windows 10? Here’s how to troubleshoot the issue and fix it:
1. Check system requirements: Ensure your Intel Mac meets the necessary requirements for Boot Camp and Windows 10.
2. Troubleshoot Boot Camp Assistant: Follow these steps to resolve common Assistant problems and error messages.
3. Fix: Boot Camp installation failed: Try these solutions if you encounter an error during installation.
4. Install Windows Support Software: After installing Windows, use Boot Camp Assistant to install the necessary drivers for Windows to work properly on your Mac.
5. Check storage space: Ensure you have enough free space on your startup disk to accommodate the Windows installation.
6. Use a compatible USB flash drive: Make sure the flash drive you’re using to create a Windows installer is compatible with your Mac.
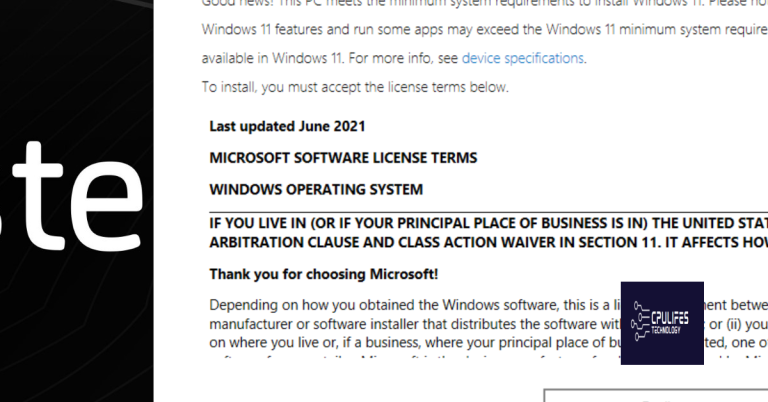
Download Windows 10 ISO from Microsoft Website
If you’re experiencing problems with Boot Camp Assistant or a failed installation of Windows 10, we have solutions for you.
First, make sure you have the latest version of Boot Camp. Check for updates on the Apple Support page.
To troubleshoot Boot Camp Assistant problems, follow these steps:
1. Check your internet connection and make sure it’s stable.
2. Verify that your Intel Mac meets the requirements for Windows 10 installation.
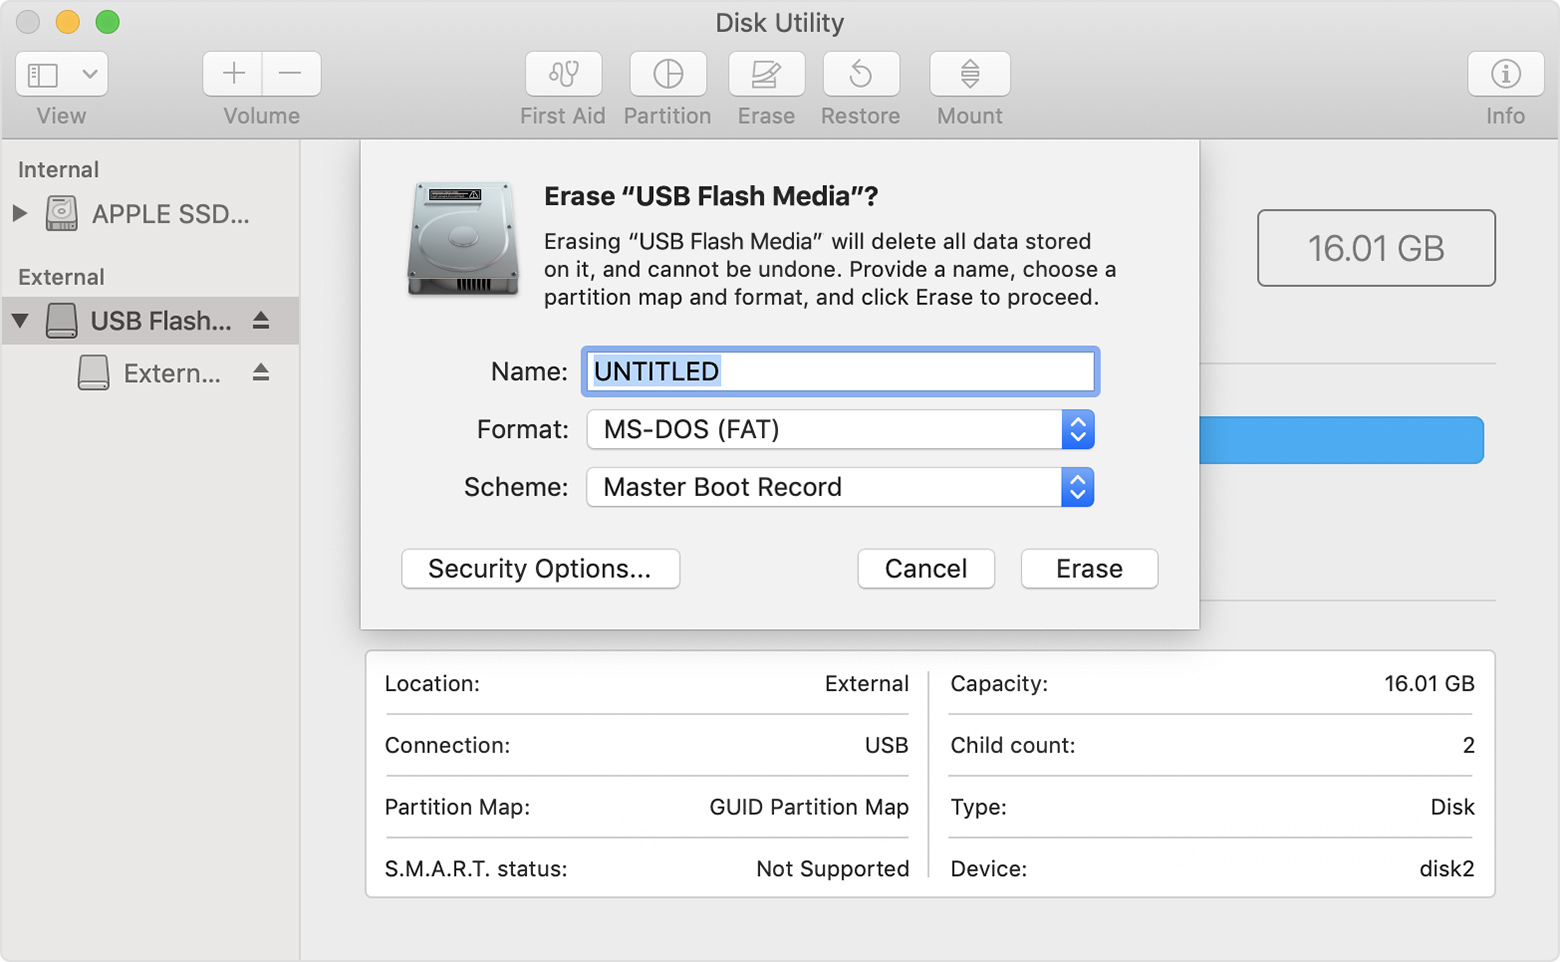
3. Double-check that your USB flash drive is formatted as MS-DOS FAT.
4. Restart your Mac and try the installation again.
5. If you encounter an error message, search for the specific error online for troubleshooting steps.
If you’re still having issues, try these additional fixes:
1. Reset your Mac’s NVRAM or PRAM.
2. Update your macOS to the latest version.
3. Disable any VPN or proxy servers.
4. Make sure your router is properly configured.
5. Check your Bluetooth settings and make sure it’s enabled.
Turn off FileVault on Your Mac
To turn off FileVault on your Mac, follow these steps:
1. Go to the Apple menu and select “System Preferences.”
2. Click on “Security & Privacy.”
3. Go to the “FileVault” tab.
4. Click on the lock icon and enter your administrator password.
5. Click on the “Turn Off FileVault” button.
Note that turning off FileVault will decrypt your Mac’s data, which may take some time.
If you encounter any issues or error messages during the process, make sure to check for software updates and restart your Mac before trying again. Additionally, ensure that you have enough free disk space and that your Mac is connected to a stable internet connection.
For more detailed troubleshooting steps or if you need further assistance, you can visit the Apple Support page or contact Apple directly.
Upgrade macOS to Monterey or Ventura
Troubleshoot Boot Camp Assistant problems and failed installation on macOS Monterey or Ventura:
1. Ensure your Mac meets the system requirements for macOS Monterey or Ventura. Check the Apple website for details.
2. Update macOS to the latest version available before proceeding with the Boot Camp installation.
3. Make sure your Windows ISO file is compatible with Boot Camp. Download the latest Windows 10 ISO from the Microsoft website.
4. Verify that your Mac is connected to the internet and has a stable connection.
5. Restart your Mac and try running Boot Camp Assistant again.
6. If the installation fails, try resetting the NVRAM or PRAM on your Mac.
7. If you encounter Bluetooth or startup disk issues after installation, update your Boot Camp drivers using the Boot Camp Control Panel in Windows.
8. If the problem persists, consider contacting Apple Support or visiting an Apple Store for further assistance.
Remember to always back up your data before making any changes to your Mac’s operating system or partitioning your hard drive.
Reference:
– Apple Support: Boot Camp Assistant Overview and Troubleshooting Guide
Install Windows 10 on Mac without BootCamp
If you’re experiencing problems with Boot Camp Assistant or a failed installation of Windows 10 on your Mac, don’t worry. We’re here to help you troubleshoot and fix these issues.
First, ensure that your Mac is running the latest version of macOS. Open the App Store, go to “Updates,” and install any available updates.
If the installation still fails, there are a few steps you can take. Make sure your Mac meets the system requirements for Windows 10, and check that your ISO file is not corrupted.
To fix Boot Camp Assistant problems, try resetting the NVRAM or PRAM on your Mac. Restart your Mac and hold down the Command, Option, P, and R keys until you hear the startup sound twice.
If you’re having trouble with Boot Camp Assistant not responding, try force quitting the app and reopening it. You can do this by pressing Command + Option + Esc, selecting Boot Camp Assistant, and clicking the “Force Quit” button.
If none of these solutions work, you may need to update your Mac’s firmware or try a different USB port.
What to Do If Boot Camp Can’t Install Windows Support Software
- Check system requirements: Ensure that your Mac meets the minimum system requirements for running Windows 10 and Boot Camp Assistant.
- Update macOS: Make sure that your Mac is running the latest version of macOS. Check for any available updates and install them.
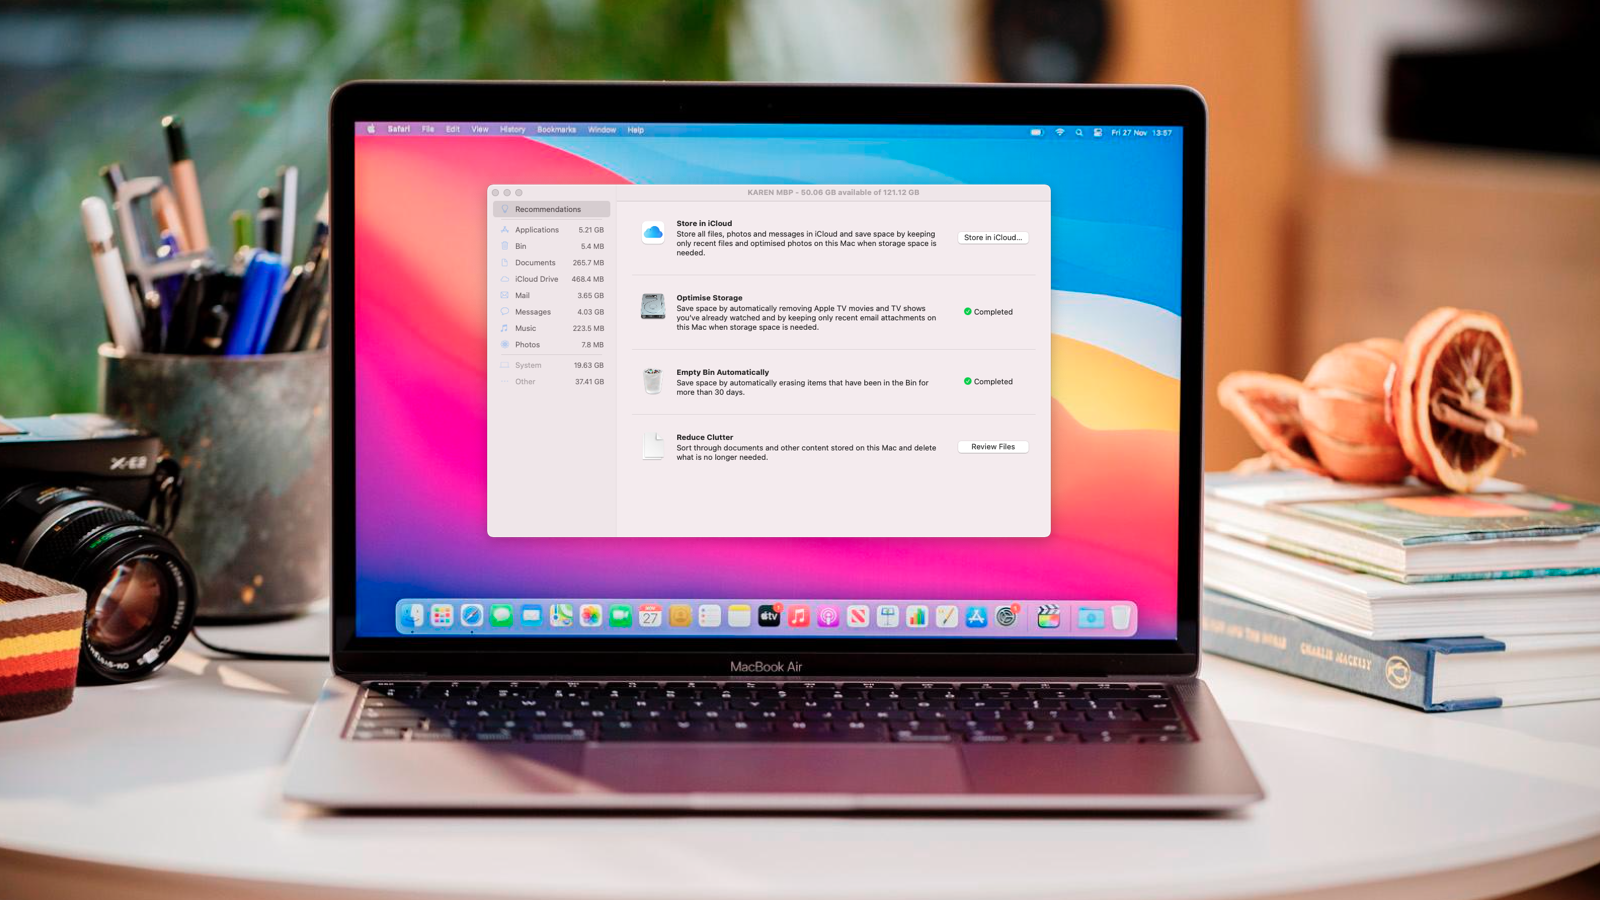
- Free up disk space: Delete any unnecessary files or applications to create enough free space on your Mac’s hard drive for the Windows support software.
- Restart your Mac: Sometimes a simple restart can resolve installation issues. Restart your Mac and try running Boot Camp Assistant again.
- Disable antivirus software: Temporarily disable any third-party antivirus software or security programs that might interfere with the installation process. Remember to enable them again after the installation is complete.
- Reset NVRAM/PRAM: Resetting the NVRAM (non-volatile random-access memory) or PRAM (parameter random-access memory) can help resolve certain boot and system configuration issues. Restart your Mac and hold down the Command + Option + P + R keys until you hear the startup sound twice.
- Try a different USB port: If you are using a USB drive to install the Windows support software, try connecting it to a different USB port on your Mac.
- Download Windows support software manually: If Boot Camp Assistant still fails to install the Windows support software, you can manually download it from Apple’s website. Locate the correct drivers for your Mac model and follow the instructions provided by Apple to install them.

- Update Windows: If you have successfully installed Windows, but the support software fails to install, make sure that your Windows installation is up to date. Check for any available updates through the Windows Update feature.
- Seek professional assistance: If none of the above steps resolve the issue, it is recommended to seek assistance from an Apple Support representative or visit an Apple Authorized Service Provider for further troubleshooting and assistance.
Quick Checks
- Verify system requirements: Ensure your Mac meets the minimum specifications to run Boot Camp Assistant and Windows 10.
- Update macOS: Make sure you have the latest version of macOS installed on your Mac.

- Check Boot Camp Assistant compatibility: Ensure that your Mac model supports Boot Camp Assistant and Windows 10.
- Free up disk space: Ensure you have enough free space on your Mac’s hard drive to accommodate Windows 10 installation.
- Run disk utility: Use Disk Utility to check and repair any disk errors on your Mac.
- Disable file encryption: Temporarily disable file encryption on your Mac before attempting to install Windows 10.
- Update Boot Camp drivers: Download and install the latest Boot Camp drivers for your Mac model.
- Disable antivirus software: Temporarily disable any antivirus software on your Mac before running Boot Camp Assistant.
- Disconnect external devices: Unplug any unnecessary peripherals from your Mac before starting the Boot Camp installation process.
- Restart in Safe Mode: Restart your Mac in Safe Mode and try running Boot Camp Assistant again.
- Reset PRAM/NVRAM: Resetting the PRAM/NVRAM on your Mac can help resolve certain Boot Camp Assistant issues.
- Perform a clean Windows 10 installation: If all else fails, consider performing a clean installation of Windows 10 using Boot Camp Assistant.