Fix Laptop Keyboard Keys Not Working
Unlock the secrets to reviving your laptop’s keyboard functionality with these expert tips and tricks. Say goodbye to the frustration of unresponsive keys and hello to smooth typing once again.
Troubleshooting laptop keyboard issues
If you’re experiencing issues with your laptop keyboard keys not working, follow these troubleshooting steps to resolve the problem:
1. Check for physical damage: Inspect your keyboard for any visible damage, such as loose or stuck keys. If you notice any issues, consider contacting the manufacturer for repairs.
2. Restart your laptop: Sometimes, a simple restart can fix keyboard issues. Click on the Start menu, select “Restart,” and allow your laptop to reboot.
3. Update device drivers: Outdated or incompatible device drivers can cause keyboard problems. To update your drivers, go to the manufacturer’s website and download the latest driver for your specific laptop model.
4. Clean your keyboard: Dust and debris can accumulate under the keys, causing them to malfunction. Gently clean your keyboard using compressed air or a soft cloth to remove any dirt or particles.
5. Check keyboard settings: Ensure that your keyboard settings are configured correctly. Go to the Control Panel, select “Keyboard,” and adjust the settings as needed.
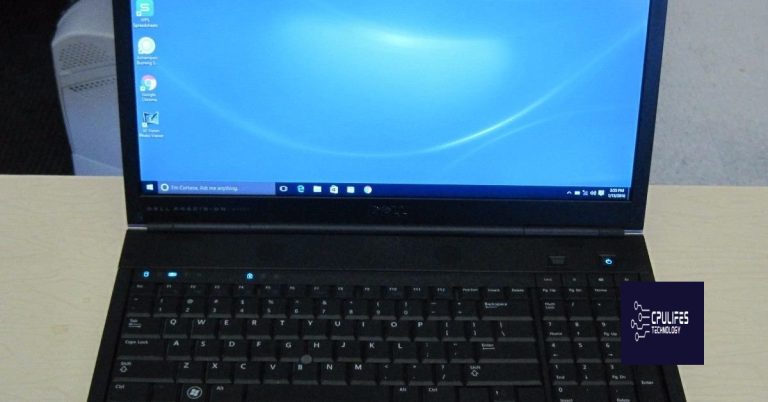
6. Try an external keyboard: If your laptop has a USB port, connect an external keyboard to determine if the issue is with your laptop’s keyboard or the software.
7. Uninstall third-party software: Some third-party software components can interfere with keyboard functionality. Use the Control Panel’s “Uninstall a program” feature to remove any recently installed software.
Checking for dirt and spills
1. Start by powering off your laptop. This will prevent any accidental keystrokes during the cleaning process.
2. Gently tilt your laptop to different angles to dislodge any loose debris or crumbs that may have accumulated between the keys.
3. Use a can of compressed air to blow away any remaining dirt or dust. Be sure to hold the can upright and use short bursts of air to avoid damaging the keyboard.
4. If there are any spills on the keys, dampen a soft cloth with water or isopropyl alcohol. Make sure the cloth is only slightly damp, not wet, to prevent any liquid from seeping into the keyboard.
5. Wipe the keys and surrounding areas gently with the damp cloth, paying extra attention to any sticky or stained spots. Avoid using excessive force or abrasive materials that could scratch the keys.
6. Allow the keyboard to dry completely before turning your laptop back on. This will prevent any potential damage from moisture.
Updating keyboard drivers
To update your keyboard drivers on Windows 10, follow these steps:
1. Open the Start menu and search for “Device Manager.”
2. Click on the “Device Manager” app to open it.
3. In the Device Manager window, expand the “Keyboards” category.
4. Right-click on your keyboard (e.g., Dell Keyboard, Lenovo Keyboard) and select “Update driver.”
5. Choose the option to automatically search for updated driver software.
6. Windows will search and install the latest driver for your keyboard.
7. Restart your computer to apply the changes.
If you’re using Windows 11, the process is slightly different:
1. Open the Start menu and search for “Device Manager.”
2. Click on the “Device Manager” app to open it.
3. Expand the “Keyboards” category.
4. Right-click on your keyboard (e.g., Dell Keyboard, Lenovo Keyboard) and select “Update driver.”
5. Choose the option to automatically search for updated driver software.
6. Windows will search and install the latest driver for your keyboard.
7. Restart your computer to apply the changes.
Updating your keyboard drivers can often fix keyboard keys not working issues, so make sure to give it a try.
Changing keyboard layout
To change the keyboard layout on your Windows 10 Lenovo laptop or any other computer, follow these steps:
1. Open the Start menu and click on “Settings”.
2. In the Settings window, select “Time & Language”.
3. Click on “Language” in the left sidebar.
4. Under the “Preferred languages” section, click on the language you want to change the keyboard layout for.
5. Click on “Options” next to the language.
6. Under the “Keyboards” section, click on “Add a keyboard”.
7. Choose the keyboard layout you want from the list.
8. To make the new layout your default, click on the layout and click “Move up” until it is at the top of the list.
9. Close the Settings window.
Now your keyboard layout should be changed on your Lenovo ThinkPad, Dell Inspiron, HP Pavilion, or any other Windows 10 laptop.
If you are using Windows 11, the steps may vary slightly, but the overall process is similar. You can still access the keyboard layout settings through the Settings menu.
While it cannot directly fix physical problems with the keys, it can ensure that your system is optimized and running smoothly, potentially resolving any software-related issues that may be affecting your laptop keys.

Restarting the computer
To restart your computer and potentially fix issues with your laptop keyboard keys not working, follow these steps:
1. Save any unsaved work and close all open applications.
2. Click on the “Start” menu in the bottom-left corner of your screen.
3. Select the power icon, represented by a circle with a vertical line inside.
4. Choose “Restart” from the menu that appears.
Note: If you are unable to use your mouse, press the Alt + F4 keys together on your keyboard to open the Shutdown menu. Use the arrow keys to navigate to the “Restart” option and press Enter to confirm.
5. Your computer will now begin the restart process. Wait for it to shut down completely and then turn back on.
Once your computer has restarted, check if the issue with your laptop keyboard keys not working has been resolved. If not, further troubleshooting may be required.
Reinstalling keyboard drivers
If you’re experiencing issues with your laptop keyboard keys not working, it may be necessary to reinstall the keyboard drivers. Here’s how you can do it:
1. Press the Windows key + X on your keyboard to open the Start menu.
2. From the context menu that appears, select “Device Manager.”
3. In the Device Manager window, expand the “Keyboards” category.
4. Right-click on your keyboard device and select “Uninstall device.”
5. A confirmation dialog box will appear. Check the box that says “Delete the driver software for this device” and click “Uninstall.”
6. Once the driver has been uninstalled, go to the manufacturer’s website or the laptop manufacturer’s support page to download the latest keyboard drivers for your specific model.
7. Install the downloaded driver by double-clicking on it and following the on-screen instructions.
8. Restart your laptop to complete the installation process.
After following these steps, your keyboard drivers should be reinstalled, and the issue with the non-working keys should be resolved.
Checking for crumbs and debris
To fix laptop keyboard keys not working, it’s essential to check for crumbs and debris that may be interfering with the keys’ functionality. Here’s a step-by-step guide to help you:
1. Begin by turning off your laptop and disconnecting any external keyboards.
2. Gently turn the laptop upside down and lightly tap the back to dislodge any loose debris.
3. Use a can of compressed air to blow away any stubborn crumbs or dust particles from the keyboard. Ensure to hold the can upright and use short bursts of air.
4. If the issue persists, try using a soft brush or a clean toothbrush to carefully brush away any remaining debris.
5. Once you’ve cleaned the keyboard, turn on your laptop and test the keys to see if they’re working properly.
If you’re still experiencing issues with specific keys, it’s possible that there may be an underlying hardware or software problem. In such cases, we recommend reaching out to the manufacturer’s support or a qualified technician for further assistance.
Reseating connections
If your laptop keyboard keys are not working properly, one possible solution is to reseat the connections. Reseating the connections can help fix any loose or faulty connections that may be causing the issue. Here’s how you can do it:
1. Start by turning off your laptop and disconnecting it from any power source.
2. Carefully remove the keyboard from your laptop. The process may vary depending on the laptop model, so refer to the manufacturer’s instructions or search online for specific steps for your laptop model.
3. Once the keyboard is removed, check the connection between the keyboard and the motherboard. Ensure that the ribbon cable or connector is securely attached.
4. If the connection looks loose, carefully disconnect it and then reconnect it, making sure it is properly seated.
5. After reseating the connection, reassemble the keyboard back into your laptop.
6. Turn on your laptop and check if the keyboard keys are now working properly.
Checking keyboard layout settings
To check your keyboard layout settings on Windows 10, follow these steps:
1. Press the Windows key on your keyboard to open the Start Menu.
2. Type “Keyboard” and select “Keyboard settings” from the search results.
3. In the Keyboard settings window, scroll down to the “Related settings” section and click on “Advanced keyboard settings.”
4. Under the “Input language hotkeys” section, click on “Change language bar hot keys.”
5. In the Text Services and Input Languages window, click on the “Advanced Key Settings” tab.
6. Under the “Hot keys for input languages” section, click on “Change Key Sequence.”
7. Select the desired key sequence for switching between input languages or keyboard layouts.
8. Click “OK” to save the changes and close the windows.
If you’re using a different Windows version or laptop model, the steps may vary slightly. Consult your device’s documentation or search online for specific instructions.
Removing the battery (if applicable)
To remove the battery (if applicable) on your laptop keyboard, follow these steps:
1. Turn off your laptop and unplug it from the power source.
2. Close the laptop lid and flip it over so that the bottom is facing up.
3. Look for the battery release latch or switch on the bottom of the laptop. It may be labeled with a battery symbol.
4. Slide or press the latch or switch to release the battery.
5. Once the latch is released, gently lift the battery out of its compartment.
6. If your laptop doesn’t have a removable battery, you can skip this step.
Remember, removing the battery is not applicable to all laptop models. If your laptop doesn’t have a removable battery, you’ll need to troubleshoot the keyboard issue using other methods.
If you’re still experiencing keyboard problems after removing the battery, it’s recommended to update your keyboard drivers or seek further assistance from the manufacturer’s support team.
Caution: Several laptop keys are malfunctioning and unresponsive. Download this tool to run a scan