Windows 10 Not Responding Solutions & Fixes
Are you experiencing issues with Windows 10 not responding? Here are some solutions and fixes to help resolve the issue.
Understanding the Root Causes of Unresponsiveness
To understand the root causes of unresponsiveness in Windows 10, it’s important to consider various factors that could be contributing to the issue. This could include issues such as software bugs, corrupt files, malware infections, or hardware problems. Start by checking for any virus or malware infections using a reliable antivirus software. Additionally, run a CHKDSK scan to check for any errors in your hard drive that may be causing the unresponsiveness. If the problem persists, it may be necessary to update device drivers or perform a Windows Update to ensure that your system is running smoothly. By identifying the root causes of unresponsiveness, you can effectively troubleshoot and find the right solutions to fix the issue.
Restart Your Computer to Resolve Temporary Issues
Restart your computer to resolve temporary issues with Windows 10 not responding. This simple step can often clear up minor glitches and get your system running smoothly again. After restarting, check to see if the problem is resolved. If not, you can move on to more advanced troubleshooting steps.
Update Drivers to Improve Hardware Functionality
To improve the functionality of your hardware on Windows 10, it’s essential to update your device drivers regularly. Outdated drivers can cause hardware to not respond or perform poorly. To update your drivers, open Device Manager and locate the device you want to update. Right-click on the device and select “Update driver. ” You can also visit the manufacturer’s website to download the latest driver for your specific hardware.
After updating the drivers, restart your computer to apply the changes. This simple step can often resolve hardware issues and improve overall system performance.
Uninstall or Reinstall Problematic Applications
To uninstall problematic applications: Go to the Control Panel and select Programs and Features. Find the application causing issues and select Uninstall. Follow the prompts to complete the uninstallation process. If the application is still causing problems after uninstalling, try reinstalling it to see if that resolves the issue.
Download the latest version of the application from the official website and install it on your computer. After reinstalling, check if the application is now responding properly. If not, consider seeking further technical support to diagnose the issue.
Run System Troubleshooter for Automated Fixes
To troubleshoot Windows 10 not responding issues, use the System Troubleshooter for automated fixes. Press the Windows key + I to open Settings, then navigate to Update & Security and select Troubleshoot. Run the Windows Store Apps troubleshooter to fix issues with apps not responding. You can also run the Hardware and Devices troubleshooter to fix hardware-related problems.
If the troubleshooter doesn’t solve the issue, consider checking for Windows updates or updating device drivers. If you suspect a software bug, consider performing a clean boot to identify the conflicting program.
Perform a Clean Boot to Isolate Software Conflicts
1. Press the Windows key + R to open the Run dialog box.
2. Type “msconfig” and press Enter to open the System Configuration utility.
3. In the General tab, select “Selective startup” and uncheck “Load startup items.”
4. Go to the Services tab, check “Hide all Microsoft services,” then click “Disable all.”
5. Click Apply and OK, then restart your computer.
Performing a Clean Boot will help identify any software conflicts that may be causing Windows 10 to not respond. This troubleshooting step can help pinpoint the specific program or service that is causing the issue, allowing you to take the necessary steps to resolve it.
Free Up Storage and Extend System Partition
- Clear Temporary Files
- Open File Explorer
- Select This PC
- Right-click on the C drive and select Properties
- Click on Disk Cleanup
- Select the files to delete and click OK
- Uninstall Unnecessary Programs
- Open Control Panel
- Click on Uninstall a program
- Right-click on the program and select Uninstall
- Extend System Partition
- Open Disk Management by right-clicking on the Start button and selecting Disk Management
- Right-click on the C drive and select Extend Volume
- Follow the wizard to extend the partition
Scan for and Remove Malware Threats
If the Windows Security tool doesn’t find any malware, you can also consider using a reputable third-party antivirus software to perform a more in-depth scan. Make sure to keep your antivirus software up to date to ensure it can detect the latest threats.
In addition to scanning for malware, you should also regularly update your operating system and software to patch any vulnerabilities that could be exploited by malware. This can be done through Windows Update and by ensuring your installed programs are also up to date.
Being proactive about scanning for and removing malware can help prevent Windows 10 from becoming unresponsive due to malicious software.
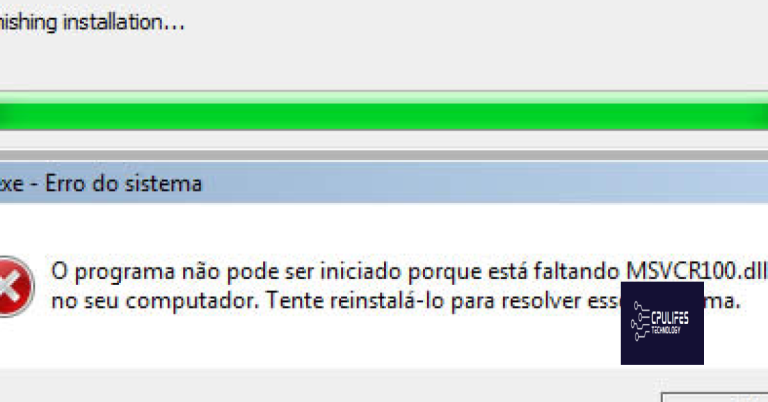
Repair Corrupted System Files Manually or Automatically
Repairing corrupted system files in Windows 10 can be done manually or automatically. To repair corrupted system files manually, you can use the System File Checker tool by following these steps: Open Command Prompt as an administrator, then type “sfc /scannow” and press Enter. The tool will scan for and repair any corrupted system files it finds. If you prefer to repair corrupted system files automatically, you can use the Deployment Image Servicing and Management tool by following these steps:
Open Command Prompt as an administrator, then type “DISM /Online /Cleanup-Image /RestoreHealth” and press Enter. This tool will automatically repair any corrupted system files it finds.
Check and Install Latest Windows Updates
Check for Windows Updates: Go to the Start menu and type “Windows Update” in the search bar. Click on “Check for updates” and let the system scan for any available updates.
Install Latest Updates: Once the system has finished scanning, click on “Install updates” to download and install the latest Windows updates. Make sure to restart your computer after the updates have been installed.
Set Automatic Updates: To ensure that your system stays up to date, go to the Control Panel, click on “System and Security,” then “Windows Update,” and select “Change settings.” Choose the option to install updates automatically.
Utilize CHKDSK and SFC Utilities to Fix Disk Errors
To fix disk errors in Windows 10, you can utilize the CHKDSK and SFC utilities. These tools can help identify and repair issues with your hard drive that may be causing your system to not respond. To run CHKDSK, open a Command Prompt with administrative privileges and type chkdsk /f then press Enter. This will schedule a disk check on the next system reboot.
To run SFC, open a Command Prompt with administrative privileges and type sfc /scannow then press Enter. This will scan and repair any corrupted system files. Running these utilities can help resolve disk errors and get your Windows 10 system back to normal.
Modify Windows Registry with Caution
When dealing with Windows 10 not responding issues, it may be tempting to try and fix the problem by making changes to the Windows Registry. While this can sometimes be an effective solution, it’s important to proceed with caution.
Making incorrect changes to the Windows Registry can cause serious problems with your operating system, including making your computer completely unusable. Before making any changes, it’s crucial to back up your registry to ensure that you can restore it if something goes wrong.
If you’re not confident in your ability to modify the registry yourself, it’s best to seek help from a professional or use a trusted registry editing tool.
Address Hardware Incompatibility and Faulty RAM
Next, test your RAM using the Windows Memory Diagnostic tool. This can help identify if faulty RAM is causing the unresponsive behavior. Replace any faulty RAM sticks if necessary.
If you suspect a software bug is causing the issue, try running Windows 10 in safe mode to see if the problem persists. This can help determine if a third-party program is the culprit. Uninstall any recent software or updates that may be causing conflicts.
By addressing hardware incompatibility and faulty RAM, you can troubleshoot and resolve Windows 10 not responding issues, improving the overall performance and stability of your computer.