Working Speakers
Working speakers are an essential component of any audio system, enabling the reproduction of sound with clarity and accuracy. In this article, we will explore the various aspects of working speakers, including their function, types, and importance in different settings.
Common Causes of Laptop Speaker Malfunctions
There are several common causes for laptop speaker malfunctions that you may encounter. Here are a few potential issues and their solutions:
1. Incorrect audio settings: Sometimes, the audio settings on your laptop may be misconfigured, leading to speaker malfunctions. To check and adjust your audio settings, follow these steps:
– On Windows 10 or Windows 11, click on the Start menu, then select “Settings” and navigate to the “Sound” section. Ensure that the correct output device is selected and the volume is turned up.
– On MacOS Big Sur or later, click on the Apple menu, then select “System Preferences” and go to the “Sound” settings. Verify the output device and adjust the volume as needed.
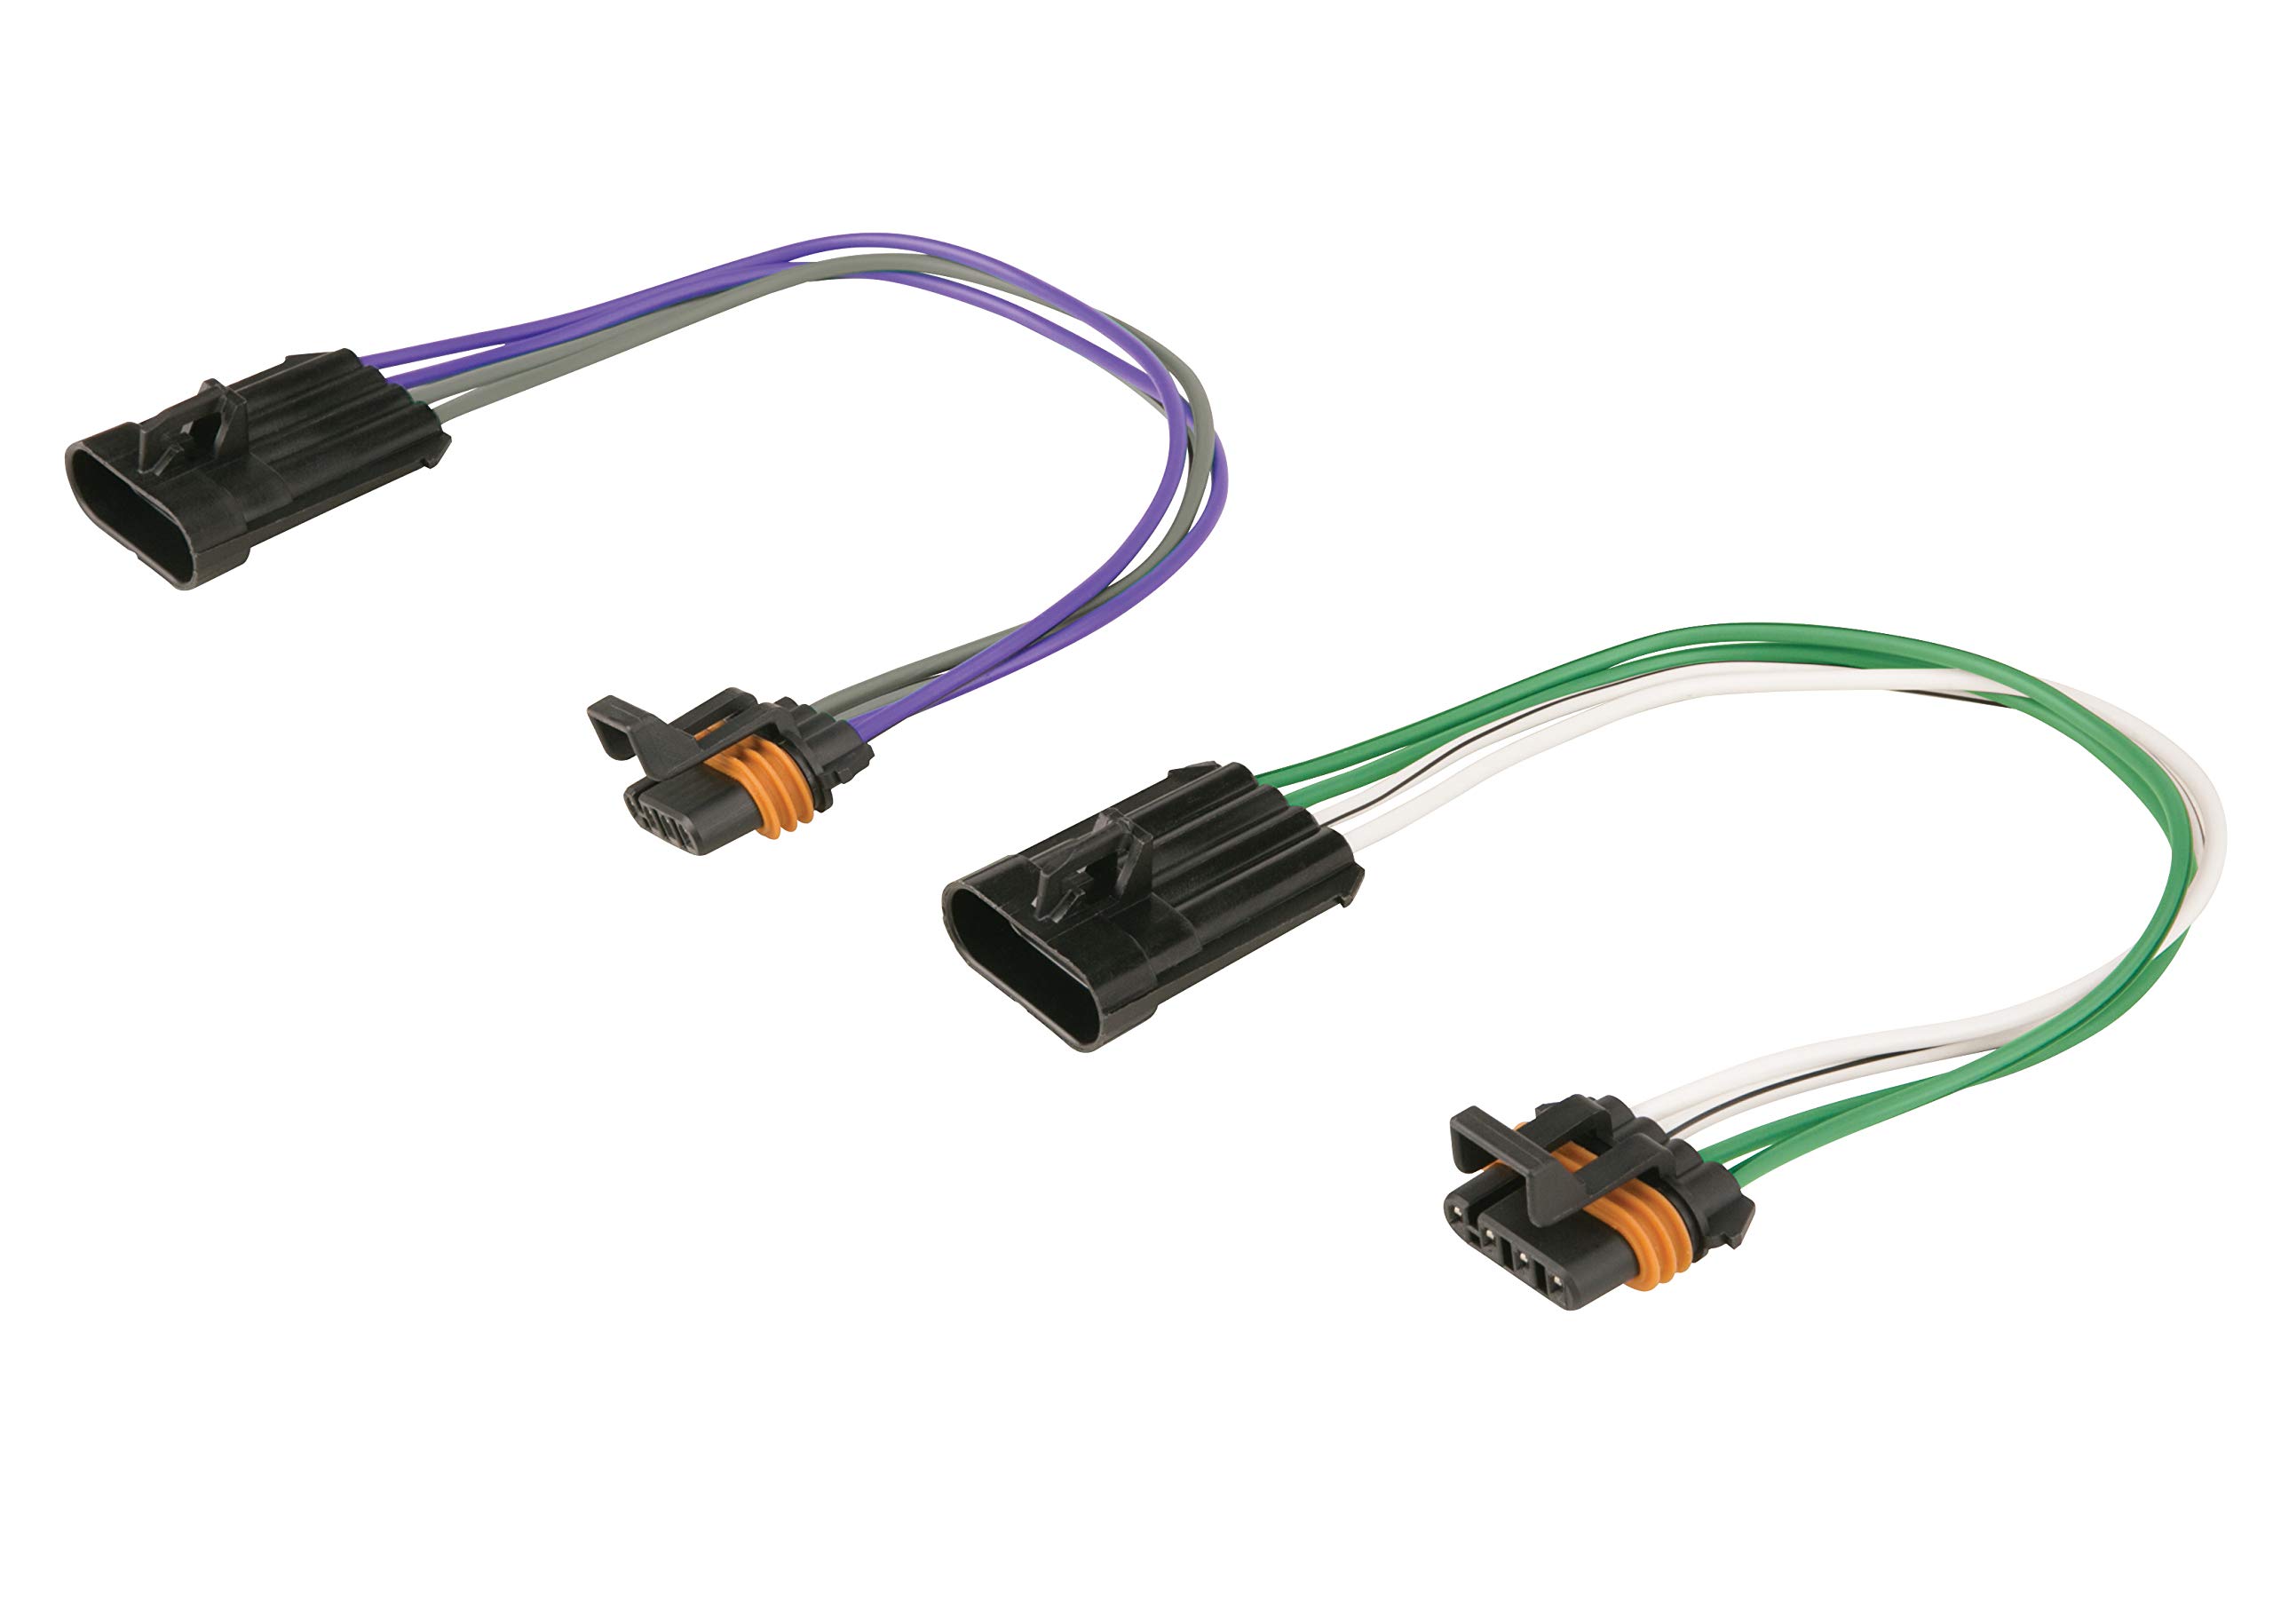
2. Faulty audio cables or connectors: If you are using external speakers or headphones, check the cables and connectors for any damage or loose connections. Try using a different cable or connector to see if the issue persists.
3. Outdated or corrupted audio drivers: Outdated or corrupted audio drivers can cause speaker malfunctions. To update your audio drivers, follow these steps:
– On Windows, right-click on the speaker icon in the taskbar and select “Open Sound settings.” Under the “Output” section, click on the “Device properties” link and then select the “Update driver” option.
– On MacOS, go to the “Sound” settings as mentioned earlier and click on the “Output” tab. If there is an available update for your audio drivers, you will see a notification.
4. Hardware issues: In some cases, the speaker hardware itself may be faulty. If you suspect a hardware issue, you can try the following:
– On Windows, open the Control Panel and navigate to the “Device Manager.” Expand the “Sound, video and game controllers” section, right-click on your audio device, and select “Uninstall device.” Restart your laptop, and Windows will automatically reinstall the audio driver.
– On MacOS, try resetting the NVRAM or PRAM by restarting your laptop and immediately pressing and holding the Command + Option + P + R keys until you hear the startup sound twice.
5. Software conflicts: Conflicting applications or software can also cause speaker malfunctions. Try closing any unnecessary applications or updating them to the latest version.
Effective Solutions for Laptop Speaker Issues
If you’re experiencing issues with your laptop speakers, there are several effective solutions you can try to resolve the problem.
1. Check the volume settings: Start by ensuring that the volume is not muted or set too low. Adjust the volume using the volume control icon on the taskbar or through the Control Panel settings.
2. Update the audio driver: Outdated or incompatible audio drivers can cause speaker problems. To resolve this, visit the manufacturer’s website and download the latest driver for your specific laptop model.
3. Troubleshoot audio playback: Use the built-in troubleshooting feature in Windows 10 or Windows 11 to diagnose and fix common speaker issues. Simply search for “Troubleshoot audio playback” in the Start menu and follow the on-screen instructions.
4. Check physical connections: Ensure that the phone connector or USB cable connecting your speakers to the laptop is securely plugged in. Additionally, check for any loose or damaged cables that may be affecting the audio output.
5. Test with headphones: Plug in a pair of headphones or a headset to determine if the issue is with the laptop speakers or the audio output in general. If the sound works with headphones, the problem may lie with the laptop speakers themselves.
6. Adjust sound settings: In the Control Panel or the sound settings menu, check if the correct audio output device is selected. You can also try adjusting the speaker configuration settings to optimize the audio quality.
7. Restart your laptop: Sometimes, a simple reboot can resolve minor software glitches that may be affecting the speakers. Save your work and restart your laptop to see if the issue persists.
Troubleshooting Volume Levels
If you’re experiencing issues with the volume levels on your speakers, here are some troubleshooting steps to help you resolve the problem.
1. Check your physical connections: Ensure that your speakers are properly connected to your computer or audio device. Make sure the phone connector or USB cable is securely plugged in. If you’re using external speakers, also check the power source and ensure they’re turned on.
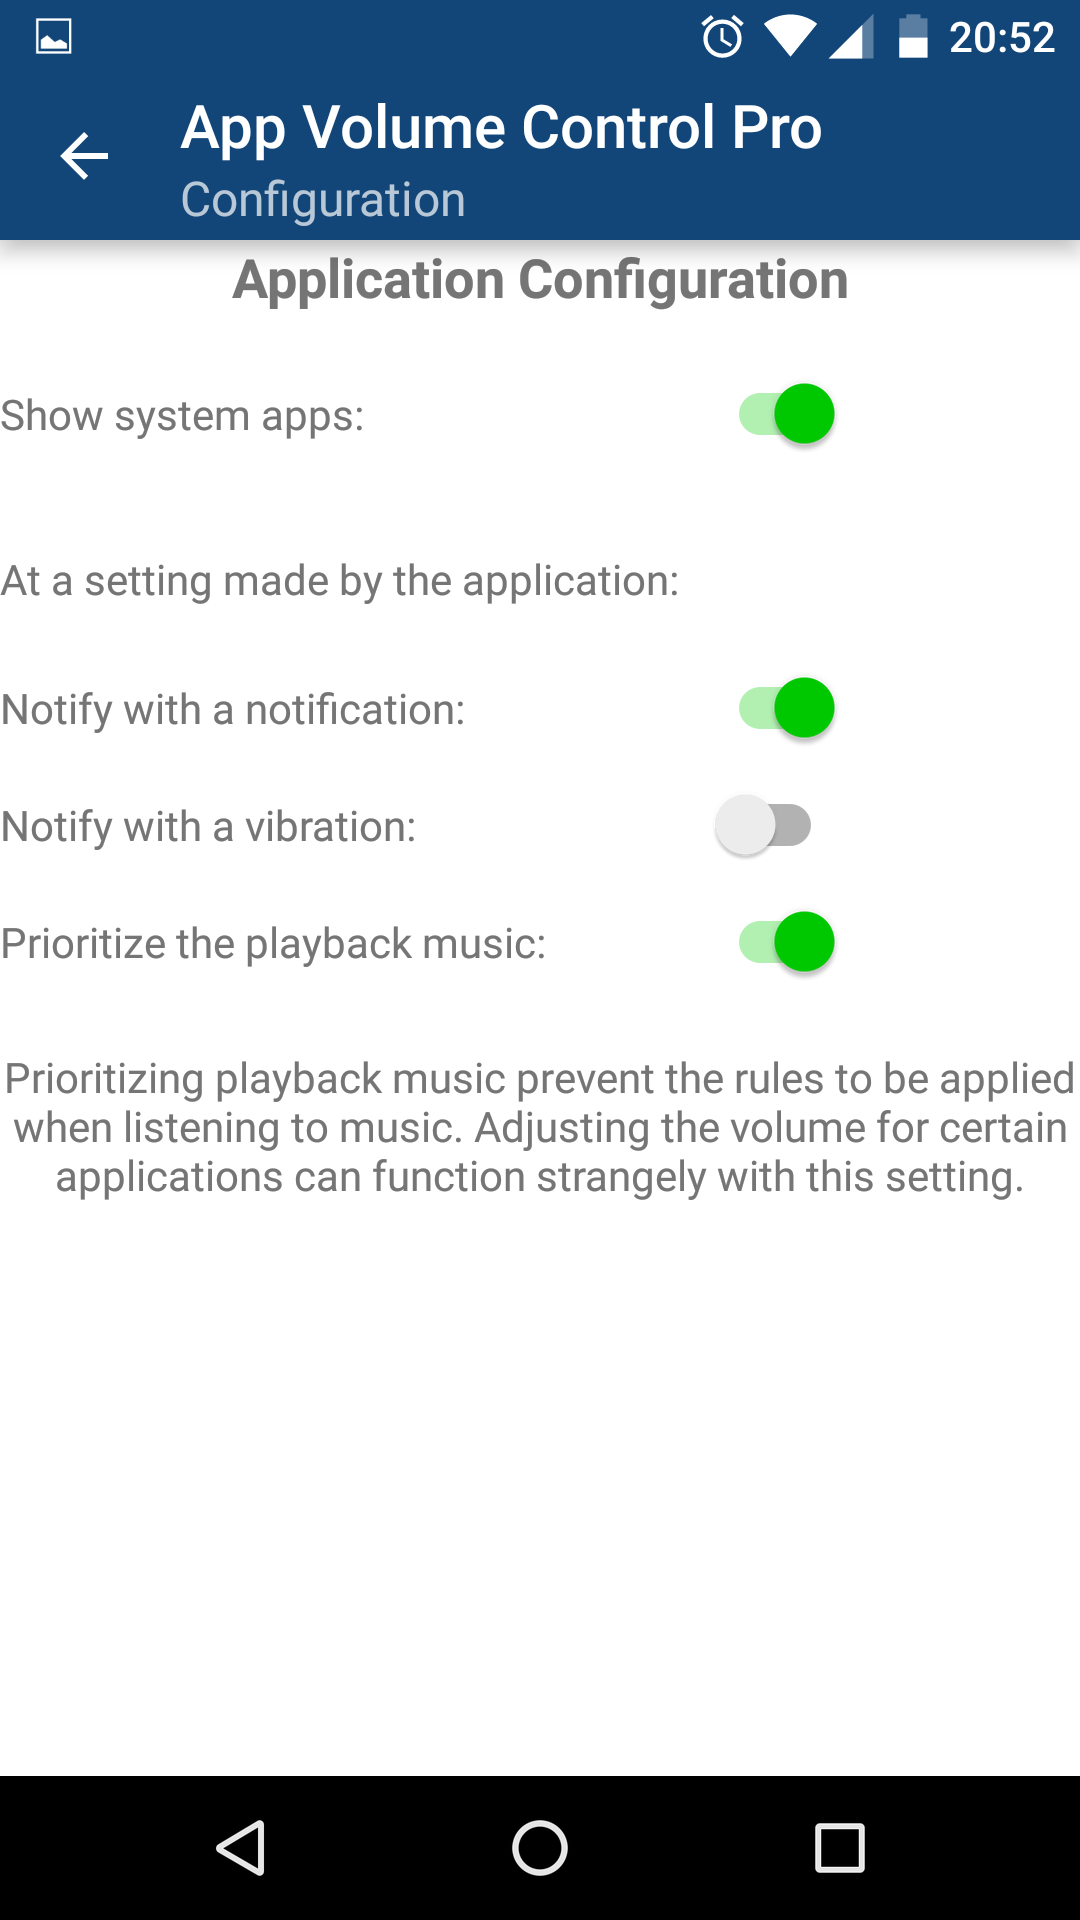
2. Adjust volume settings: On Windows, right-click the Volume icon on the taskbar and select “Open Volume Mixer” from the context menu. Here, you can adjust the volume levels for different applications individually. On MacOS Big Sur, click the Apple menu, go to “System Preferences,” and select “Sound.” Adjust the output volume slider as needed.
3. Update device drivers: Outdated or incompatible device drivers can cause sound issues. Visit the manufacturer’s website or use Windows Update to download and install the latest drivers for your speakers.
4. Check audio settings in applications: Some applications have their own volume controls. If you’re experiencing low volume in a specific application, check its settings and ensure the volume is turned up.
5. Test with alternative speakers or headphones: Connect a different set of speakers or headphones to your computer to see if the issue persists. This will help determine if the problem lies with your speakers or your computer.
6. Restart your computer: Sometimes, a simple reboot can resolve volume issues. Restart your computer and check if the volume levels return to normal.
7. Run the audio troubleshooter: Windows has a built-in audio troubleshooter that can automatically detect and fix common sound problems. To access this, go to the Control Panel, search for “Troubleshooting,” and select “Troubleshoot audio playback.”
python

import subprocess
def check_audio_devices():
"""Check the available audio devices on the system."""
try:
subprocess.run(['aplay', '-l'], check=True)
except subprocess.CalledProcessError as e:
print(f"Error: {e}")
def check_audio_settings():
"""Check the current audio settings and volume level."""
try:
subprocess.run(['amixer', 'sget', 'Master'], check=True)
except subprocess.CalledProcessError as e:
print(f"Error: {e}")
def set_volume(volume):
"""Set the system volume to the specified level."""
try:
subprocess.run(['amixer', 'sset', 'Master', f"{volume}%"], check=True)
except subprocess.CalledProcessError as e:
print(f"Error: {e}")
# Example usage
check_audio_devices()
check_audio_settings()
set_volume(80)
Please note that this code is for Linux-based systems and relies on the `aplay` and `amixer` commands to interact with the audio devices and settings. If you are using a different operating system, the commands and methods might differ.
Ensuring App Sound is Not Muted
To ensure that your app sound is not muted, follow these steps:
1. Check the volume settings on your device. Adjust the volume using the volume buttons or the volume slider in the control panel. Make sure the volume is not set to the lowest level or muted.
2. Verify that your speakers or headphones are properly connected to your device. If you are using external speakers, ensure that they are connected to the correct audio jack or port on your computer or phone. If you are using headphones, check that they are securely plugged into the headphone jack.
3. If you are using Windows, open the Control Panel and navigate to the Sound settings. Here, ensure that the correct audio device is selected as the default playback device. You can also adjust the volume and other audio settings from this menu.
4. Check the physical volume controls on your speakers or headphones, if applicable. Some devices have separate volume controls that you need to adjust.
5. Restart your device. Sometimes, a simple restart can resolve sound issues and ensure that the sound is not muted.
6. If you are using a web browser to play audio or video, make sure that the browser tab or window is not muted. Right-click on the tab or window and check the context menu for a mute option. If it is muted, click on it to unmute.
7. Ensure that the app or software you are using has the sound enabled. Look for an audio icon or option within the app’s settings or menu. If the app has a mute function, make sure it is disabled.
8. Check if the sound issue is specific to a particular app or program. Try playing sound from a different app or website to see if the problem persists. If the sound works in other applications, the issue may be with the app itself.
9. Update your device drivers. Outdated or incompatible drivers can cause sound issues. Visit the manufacturer’s website or use Windows Update to check for driver updates and install them if necessary.
10. If you are using HDMI to connect your device to an external display or TV, ensure that the audio output is set to HDMI. In the sound settings, select the HDMI audio device as the default playback device.
11. If none of the above solutions work, try using a different set of speakers or headphones to see if the issue is with the hardware. If the sound works with a different audio device, you may need to replace or repair your current speakers or headphones.
Testing Sound with Headphones
To test the sound on your speakers, follow these simple steps:
1. Connect your headphones to the appropriate audio output on your computer. This is usually a phone connector located on the front or back of your device.
2. Open the Control Panel on your Windows computer. You can do this by clicking the Start button, typing “Control Panel” in the search bar, and selecting it from the list of results.
3. In the Control Panel, navigate to the “Hardware and Sound” section and select “Sound.”
4. In the Sound menu, click on the “Playback” tab. Here, you will see a list of audio devices connected to your computer. Find the device that corresponds to your headphones and select it.
5. Once you have selected your headphones, click on the “Properties” button below the list. This will open a new window with additional settings.
6. In the Properties window, go to the “Levels” tab. Here, you can adjust the volume level of your headphones using the slider. Make sure the volume is not set to zero and that it is at a comfortable level.
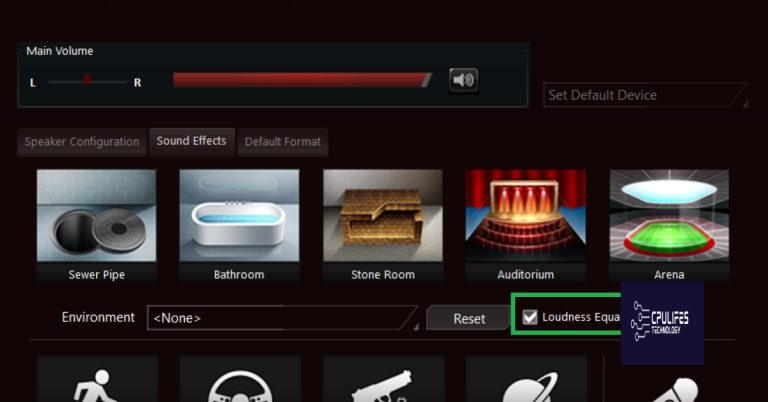
7. Next, go to the “Enhancements” tab. If you want to enhance the sound quality of your headphones, you can enable audio enhancements such as bass boost or virtual surround sound here. Experiment with these settings to find the best sound for your preferences.
8. After adjusting the volume and any desired enhancements, click “OK” to close the Properties window.
9. Now, open a web browser and navigate to a website or platform where you can play audio or video content. You can try playing a YouTube video or streaming music from an application like Spotify.
10. Play the audio or video content and listen for the sound through your headphones. Ensure that the sound is clear and that there are no distortions or issues.
11. If you encounter any problems with the sound, try the following troubleshooting steps:
– Check if the headphones are properly plugged in and connected to the correct audio output.
– Restart your computer to refresh the audio settings.
– Update your device drivers by visiting the manufacturer’s website and downloading the latest drivers for your specific model.
– Ensure that your headphones are not muted or the volume is not set to zero.
– If you’re using wireless headphones, make sure they are charged and within range of your computer.
12. If you have followed these steps and are still experiencing issues with your headphones, it may be helpful to consult the user manual or contact the manufacturer for further support. They may be able to provide additional troubleshooting steps or determine if there is a hardware issue with your headphones.
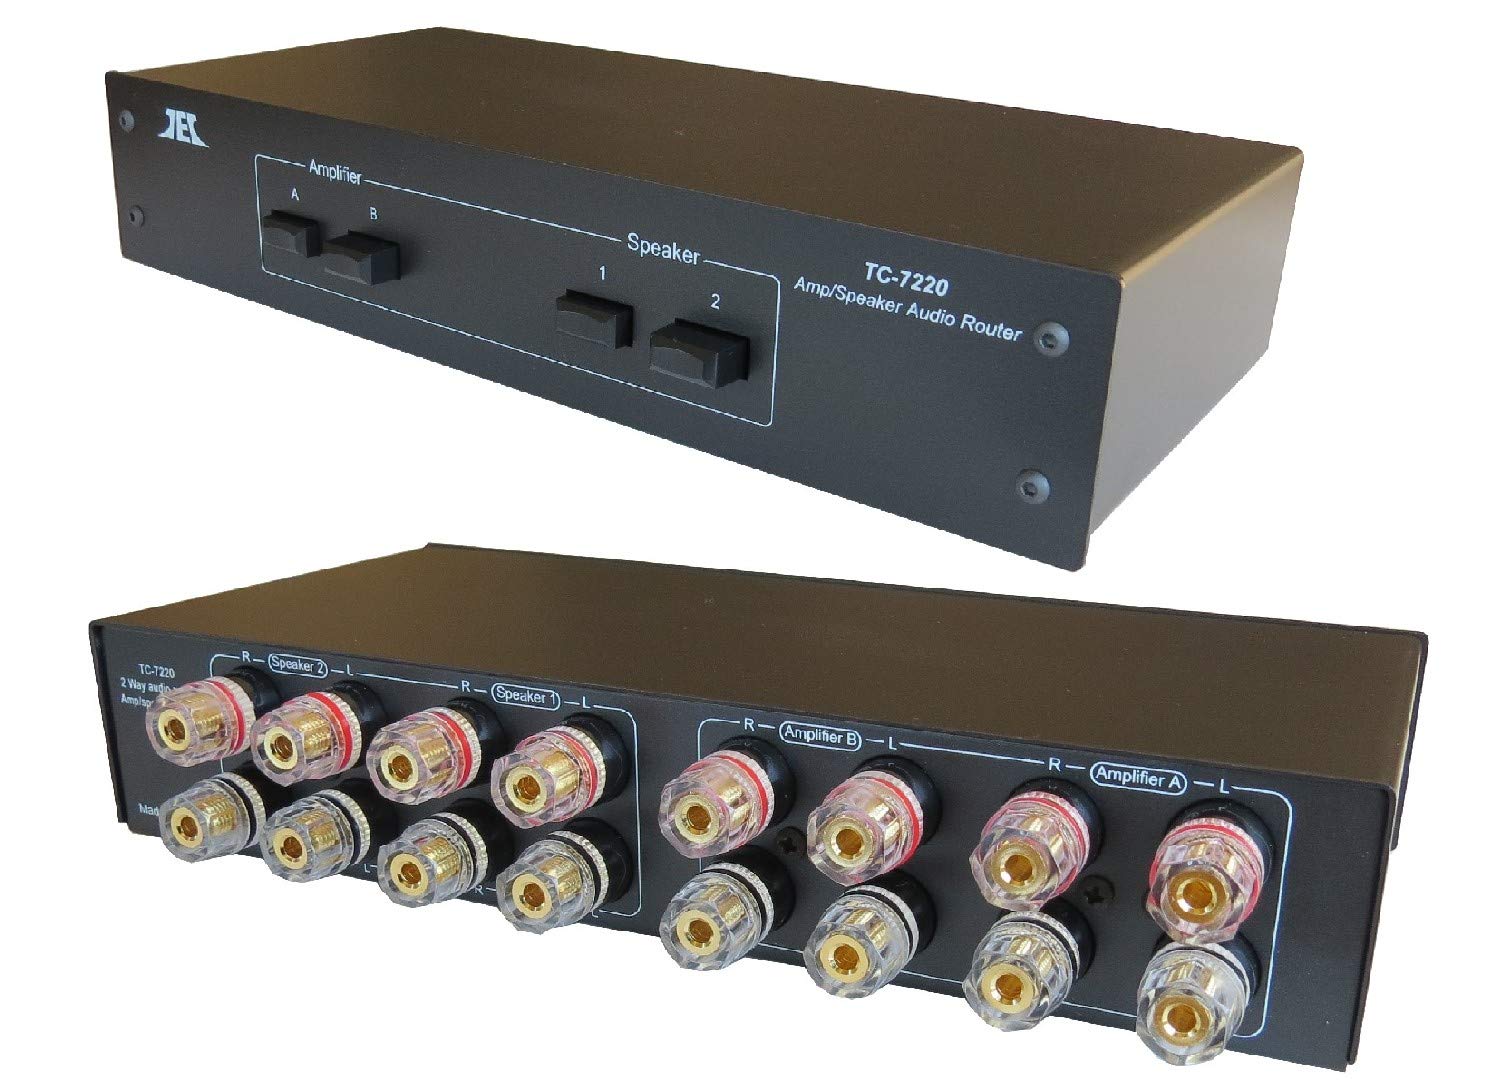
Switching Audio Devices
To switch audio devices on your Microsoft Windows computer, follow these simple steps:
1. Open the Control Panel by clicking on the Start menu and typing “Control Panel” in the search bar. Click on the Control Panel app to open it.
2. In the Control Panel, navigate to the “Hardware and Sound” section and click on “Sound”.
3. In the Sound settings window, you will see a list of all the audio devices connected to your computer. These could include speakers, headphones, or other audio output devices.
4. To switch to a different audio device, simply select the desired device from the list and click on the “Set Default” button. This will make the selected device the default audio output for your computer.
5. If you want to switch back to the previous audio device, you can easily do so by selecting it from the list and clicking on the “Set Default” button again.
6. Some audio devices may require additional steps to switch, such as changing settings in the device’s software or using a keyboard shortcut. Refer to the device’s user manual or manufacturer’s website for specific instructions.
Remember to check the device connections, ensure drivers are up to date, and troubleshoot any issues that may arise. If you encounter any difficulties, consult the manufacturer’s support resources or visit the Microsoft support website for further assistance.
Now you can enjoy your favorite music, videos, and other audio content through your desired audio device with ease.
Additionally, it can fix missing or corrupt DLL files, which are crucial for proper program functioning. While it may not directly fix speaker issues, Fortect can help ensure your system is running smoothly overall.

Disabling Audio Enhancements for Troubleshooting
To troubleshoot issues with your speakers, you can disable audio enhancements on your Windows computer. Here’s how:
1. Right-click on the speaker icon in the taskbar and select “Playback devices.”
2. In the Sound window, select your audio device and click on the “Properties” button.
3. In the Properties window, go to the “Enhancements” tab.
4. Check the box next to “Disable all enhancements” and click “OK” to save the changes.
5. If you don’t see the Enhancements tab, it’s possible that your audio driver doesn’t support this feature. In that case, you can try updating your audio driver through the Device Manager or contacting the manufacturer for assistance.
Disabling audio enhancements can help resolve issues like distorted sound, low volume, or audio playback problems. If you still experience issues after disabling the enhancements, you can try other troubleshooting steps such as updating your audio driver or checking the speaker connections.
Updating Audio Drivers for Improved Sound
To ensure your speakers are working optimally, it’s important to regularly update your audio drivers. Outdated drivers can cause sound issues such as crackling or no sound at all. Follow these steps to update your audio drivers in Windows:
1. Open the Control Panel by typing “Control Panel” in the search bar and selecting it from the results.
2. In the Control Panel, click on “Hardware and Sound” and then “Device Manager.”
3. Expand the “Sound, video, and game controllers” category and locate your audio device (such as Realtek or a sound card).
4. Right-click on your audio device and select “Update driver.”
5. Choose the option to automatically search for updated driver software. Windows will scan your computer and the internet for the latest driver.
6. If an updated driver is found, follow the on-screen instructions to install it. If no updates are found, you can try searching for drivers manually on the manufacturer’s website.
7. After the driver installation is complete, restart your computer to apply the changes.
Updating audio drivers can help resolve sound issues and improve the overall audio quality of your speakers. It’s also a good idea to check for driver updates periodically to ensure your audio device is always up to date.
Remember to check your speaker connections and volume settings as well. If you’re still experiencing issues, you may also try troubleshooting sound problems using the built-in Windows audio troubleshooter.
Note: It’s always recommended to create a system restore point before making any changes to your computer’s drivers. This allows you to revert back to a previous working state if any issues arise during the driver update process.
For more detailed instructions or troubleshooting assistance, you can refer to the Windows support website or consult PCMag’s comprehensive guides on audio driver updates.
Keep your speakers working at their best with up-to-date audio drivers from Microsoft Windows.
Utilizing Recommended Solutions

- Check the speaker connections:
- Make sure the speakers are properly connected to the audio output port on the computer.
- Ensure that the cables are securely plugged in at both ends.
- Try disconnecting and reconnecting the cables to eliminate any loose connections.
- Adjust the volume settings:
- Ensure that the volume is not muted or set to a very low level.
- Check the volume controls on both the speakers and the computer.
- Increase the volume gradually to a comfortable level.
- Update audio drivers:
- Open Device Manager by pressing Windows key + X and selecting Device Manager from the menu.
- Expand the Sound, video, and game controllers section.
- Right-click on the audio device and select Update driver.
- Choose the option to search automatically for updated driver software.
- Follow the on-screen instructions to complete the driver update process.
- Run the audio troubleshooter:
- Press Windows key + I to open the Settings app.
- Select Update & Security.
- Click on Troubleshoot in the left sidebar.
- Under Get up and running, click on Playing audio.
- Click on Run the troubleshooter and follow the instructions provided.
- Check the audio output device:
- Right-click on the volume icon in the taskbar and select Open Sound settings.
- Under the Output section, ensure that the correct audio device is selected.
- If needed, click on the drop-down menu and choose the appropriate device.
- Test the sound by playing an audio file or video.

Updating BIOS for Better Audio Performance
- Enhance your audio experience: Update your BIOS for improved audio quality.
- Update your system’s BIOS:
- Ensure you have the latest BIOS version installed on your computer.
- Check for BIOS updates: Visit the manufacturer’s website or use their software to search for the latest BIOS updates specifically targeting audio improvements.
- Download the update: Once you find the appropriate BIOS update, download it to your computer.
- Follow instructions: Carefully read the instructions provided by the manufacturer on how to install the BIOS update.
- Backup your data: Before proceeding with the update, it’s always recommended to create a backup of your important files and data.
- Restart your computer: After successfully updating the BIOS, restart your system to apply the changes.
- Test your audio: Once your computer restarts, test your audio to experience the enhanced performance.
- Troubleshooting: If you encounter any issues or inconsistencies with your audio after updating the BIOS, try reinstalling audio drivers or contacting technical support for further assistance.
Repairing Laptop Speakers
If your laptop speakers are not working properly, there are a few steps you can take to troubleshoot and potentially fix the issue.
1. Check the volume settings: Ensure that the volume is turned up and not muted. You can adjust the volume by clicking on the speaker icon in the taskbar or accessing the Control Panel in Windows.
2. Test with headphones or external speakers: Connect a pair of headphones or external speakers to your laptop and check if the audio is working through them. This will help determine if the issue is with the speakers themselves or the audio settings.
3. Update device drivers: Outdated or incompatible device drivers can cause audio problems. Visit the manufacturer’s website or use a reliable driver update software to download and install the latest drivers for your laptop’s audio hardware.
4. Check for physical damage: Inspect the laptop speakers for any visible damage or loose connections. If you notice any issues, you may need to replace the speakers or have them repaired by a professional.
5. Restart the laptop: Sometimes a simple restart can resolve audio issues. Restart your laptop and check if the speakers are functioning properly afterwards.
If these steps do not resolve the problem, it is recommended to contact the laptop manufacturer or a professional technician for further assistance. Keep in mind that attempting to repair the speakers yourself may void your warranty.
Troubleshooting Windows 10 Audio Problems
If you’re having issues with the audio on your Windows 10 computer, follow these steps to troubleshoot and resolve the problem.
1. Check the basics:
– Ensure your speakers or headphones are properly connected to the audio jack or USB port.
– Make sure the volume is not muted or set too low. Adjust the volume level using the volume icon in the taskbar.
– Test your speakers or headphones on another device to ensure they are functioning properly.
2. Update audio drivers:
– Open the Device Manager by right-clicking on the Start button and selecting “Device Manager.”
– Expand the “Sound, video and game controllers” section.
– Right-click on your audio device (e.g., Realtek High Definition Audio) and select “Update driver.”
– Choose to automatically search for updated driver software. If an update is available, follow the on-screen instructions to install it.
3. Run the audio troubleshooter:
– Open the Control Panel and navigate to “Troubleshooting” under “System and Security.”
– Click on “Playing audio” under “Hardware and Sound.”
– Follow the prompts to run the troubleshooter and let it identify and fix any audio issues.
4. Disable audio enhancements:
– Right-click on the volume icon in the taskbar and select “Sounds.”
– Go to the “Playback” tab and select your audio device.
– Click on “Properties” and go to the “Enhancements” tab.
– Check the box next to “Disable all enhancements” and click “Apply” and “OK.”
5. Check for third-party applications causing conflicts:
– Close any applications that might be using the audio device, such as media players or communication tools.
– Test the audio after closing each application to identify the one causing the conflict.
– Consider updating or uninstalling the conflicting application.
If these steps don’t resolve the issue, you may need to consult the manufacturer’s support or consider seeking professional assistance.
Running the Audio Troubleshooter
If you’re experiencing issues with your speakers, the Audio Troubleshooter can help diagnose and resolve the problem. Here’s how to run it:
1. Open the Control Panel by clicking the Start button and selecting Control Panel.
2. In the Control Panel, search for “Troubleshooting” in the search bar at the top right corner.
3. Click on “Troubleshooting” in the search results to open the Troubleshooting window.
4. Under the “Hardware and Sound” section, click on “Troubleshoot audio playback”.
5. The Audio Troubleshooter will now open. Follow the on-screen instructions to detect and fix any issues with your audio devices.
6. If the troubleshooter is unable to fix the problem, it will provide suggestions for further troubleshooting or contact the manufacturer for support.
Remember, if you’re using third-party software or applications for audio playback, make sure they’re up to date and compatible with your system. Additionally, check your audio settings in the application to ensure the correct output device is selected.
If you’re still experiencing issues after running the troubleshooter, it may be worth checking for updated device drivers or contacting the manufacturer for further assistance.
Tips for Maintaining Laptop Functionality
To ensure your laptop’s speakers function optimally, follow these tips:
1. Check audio settings: Open the Control Panel in Windows and navigate to the “Sound” or “Audio” settings. Ensure the correct playback device is selected and the volume is appropriately adjusted.
2. Update audio drivers: Visit the manufacturer’s website or use Windows Update to download and install the latest device drivers for your laptop’s audio hardware. This can resolve compatibility issues and improve audio performance.
3. Clean the speaker grilles: Over time, dust and debris can accumulate on the speaker grilles, affecting sound quality. Gently clean them using a soft toothpick or a small brush to remove any obstructions.
4. Adjust equalizer settings: Use the equalizer settings in your audio application or system settings to fine-tune the sound output according to your preferences. Experiment with different presets or customize the levels to enhance audio clarity.
5. Avoid excessive volume levels: Continuously playing audio at high volume can strain the speakers and potentially damage them. Keep the volume at a moderate level to prevent distortion or hardware issues.
6. Protect against liquid damage: Be cautious when using your laptop near liquids. Even a small spill can cause irreversible damage to the speakers. Consider using a spill-resistant keyboard cover or keeping drinks away from your laptop.
7. Avoid physical damage: Treat your laptop with care to prevent physical damage to the speakers. Avoid dropping or mishandling the device, as this can lead to speaker malfunctions.
8. Troubleshoot software issues: If you experience audio problems, try restarting your laptop or closing any applications that might be interfering with the speakers. Additionally, check for any pending software updates that could address the issue.
Warning, my laptop speakers are not functioning properly. Download this tool to run a scan
![Audio Output Device Is Installed]](https://cpulifes.com/wp-content/uploads/2023/12/626037-768x402.png)